
Geofence
With Geofences you can create specific areas and combine them with notifications. With this feature you can track movements of specific vehicles leaving or entering specific areas. You can send the notifications in-app or by email to the current driver or to other users.
This feature is currently only available in the Webapp.
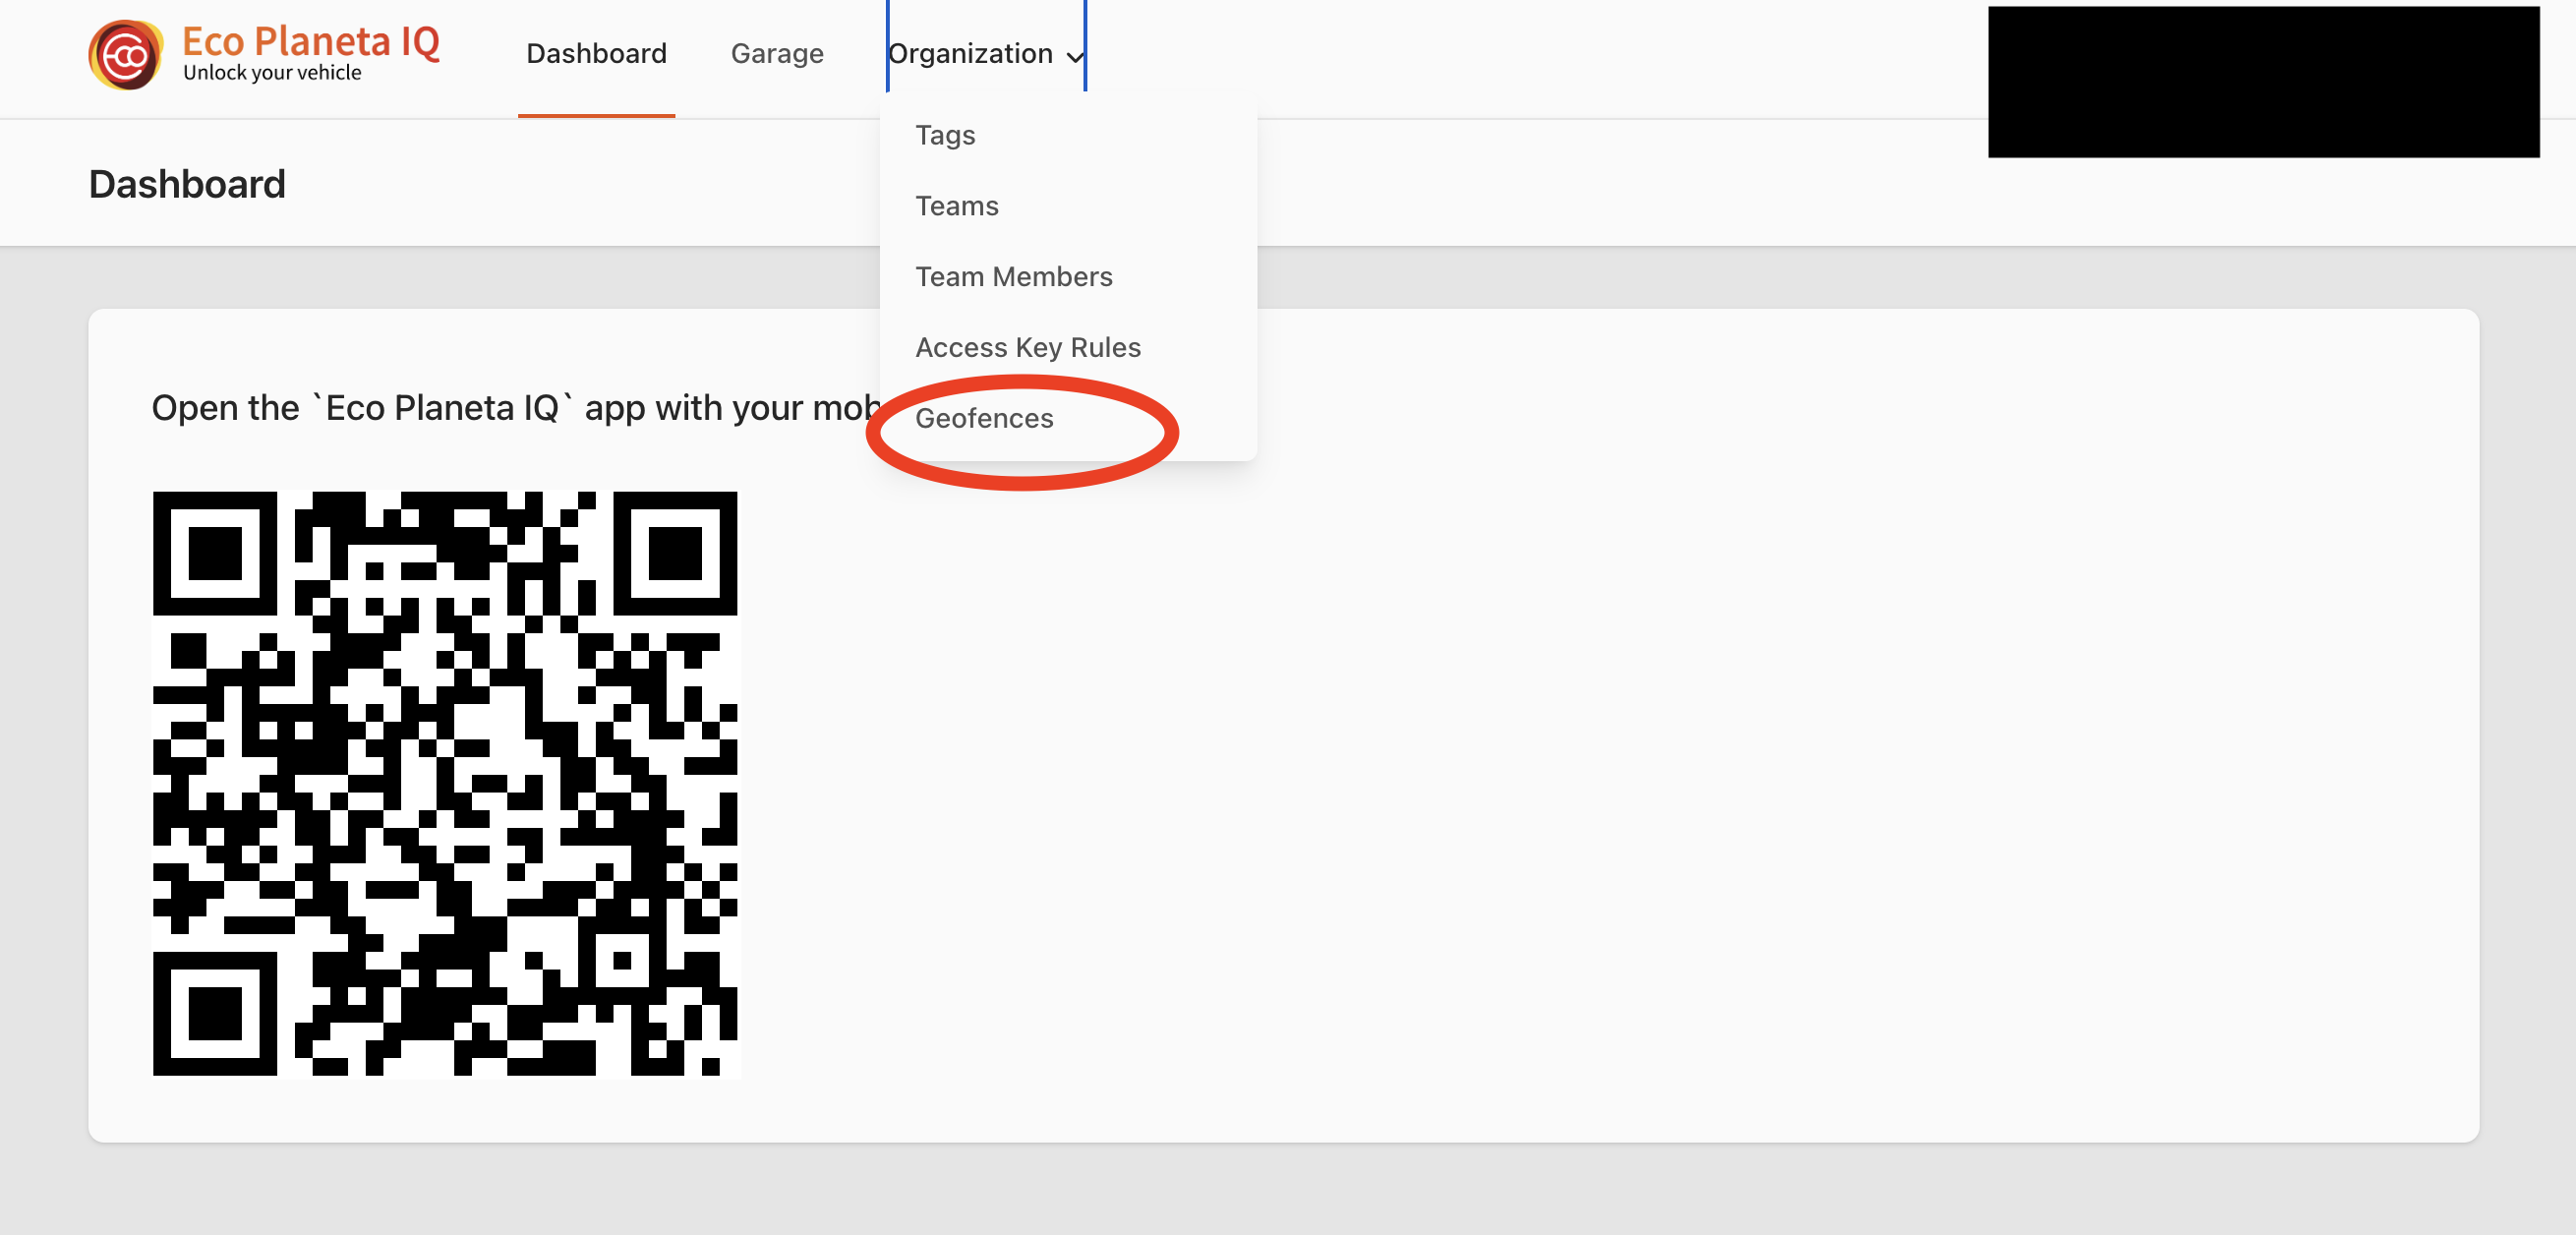
For Organization Accounts
Please note that you have only full access to this feature if you have the admin role assigned to you. As a manager and employee you have read access to this feature.
Organizations > Geofences
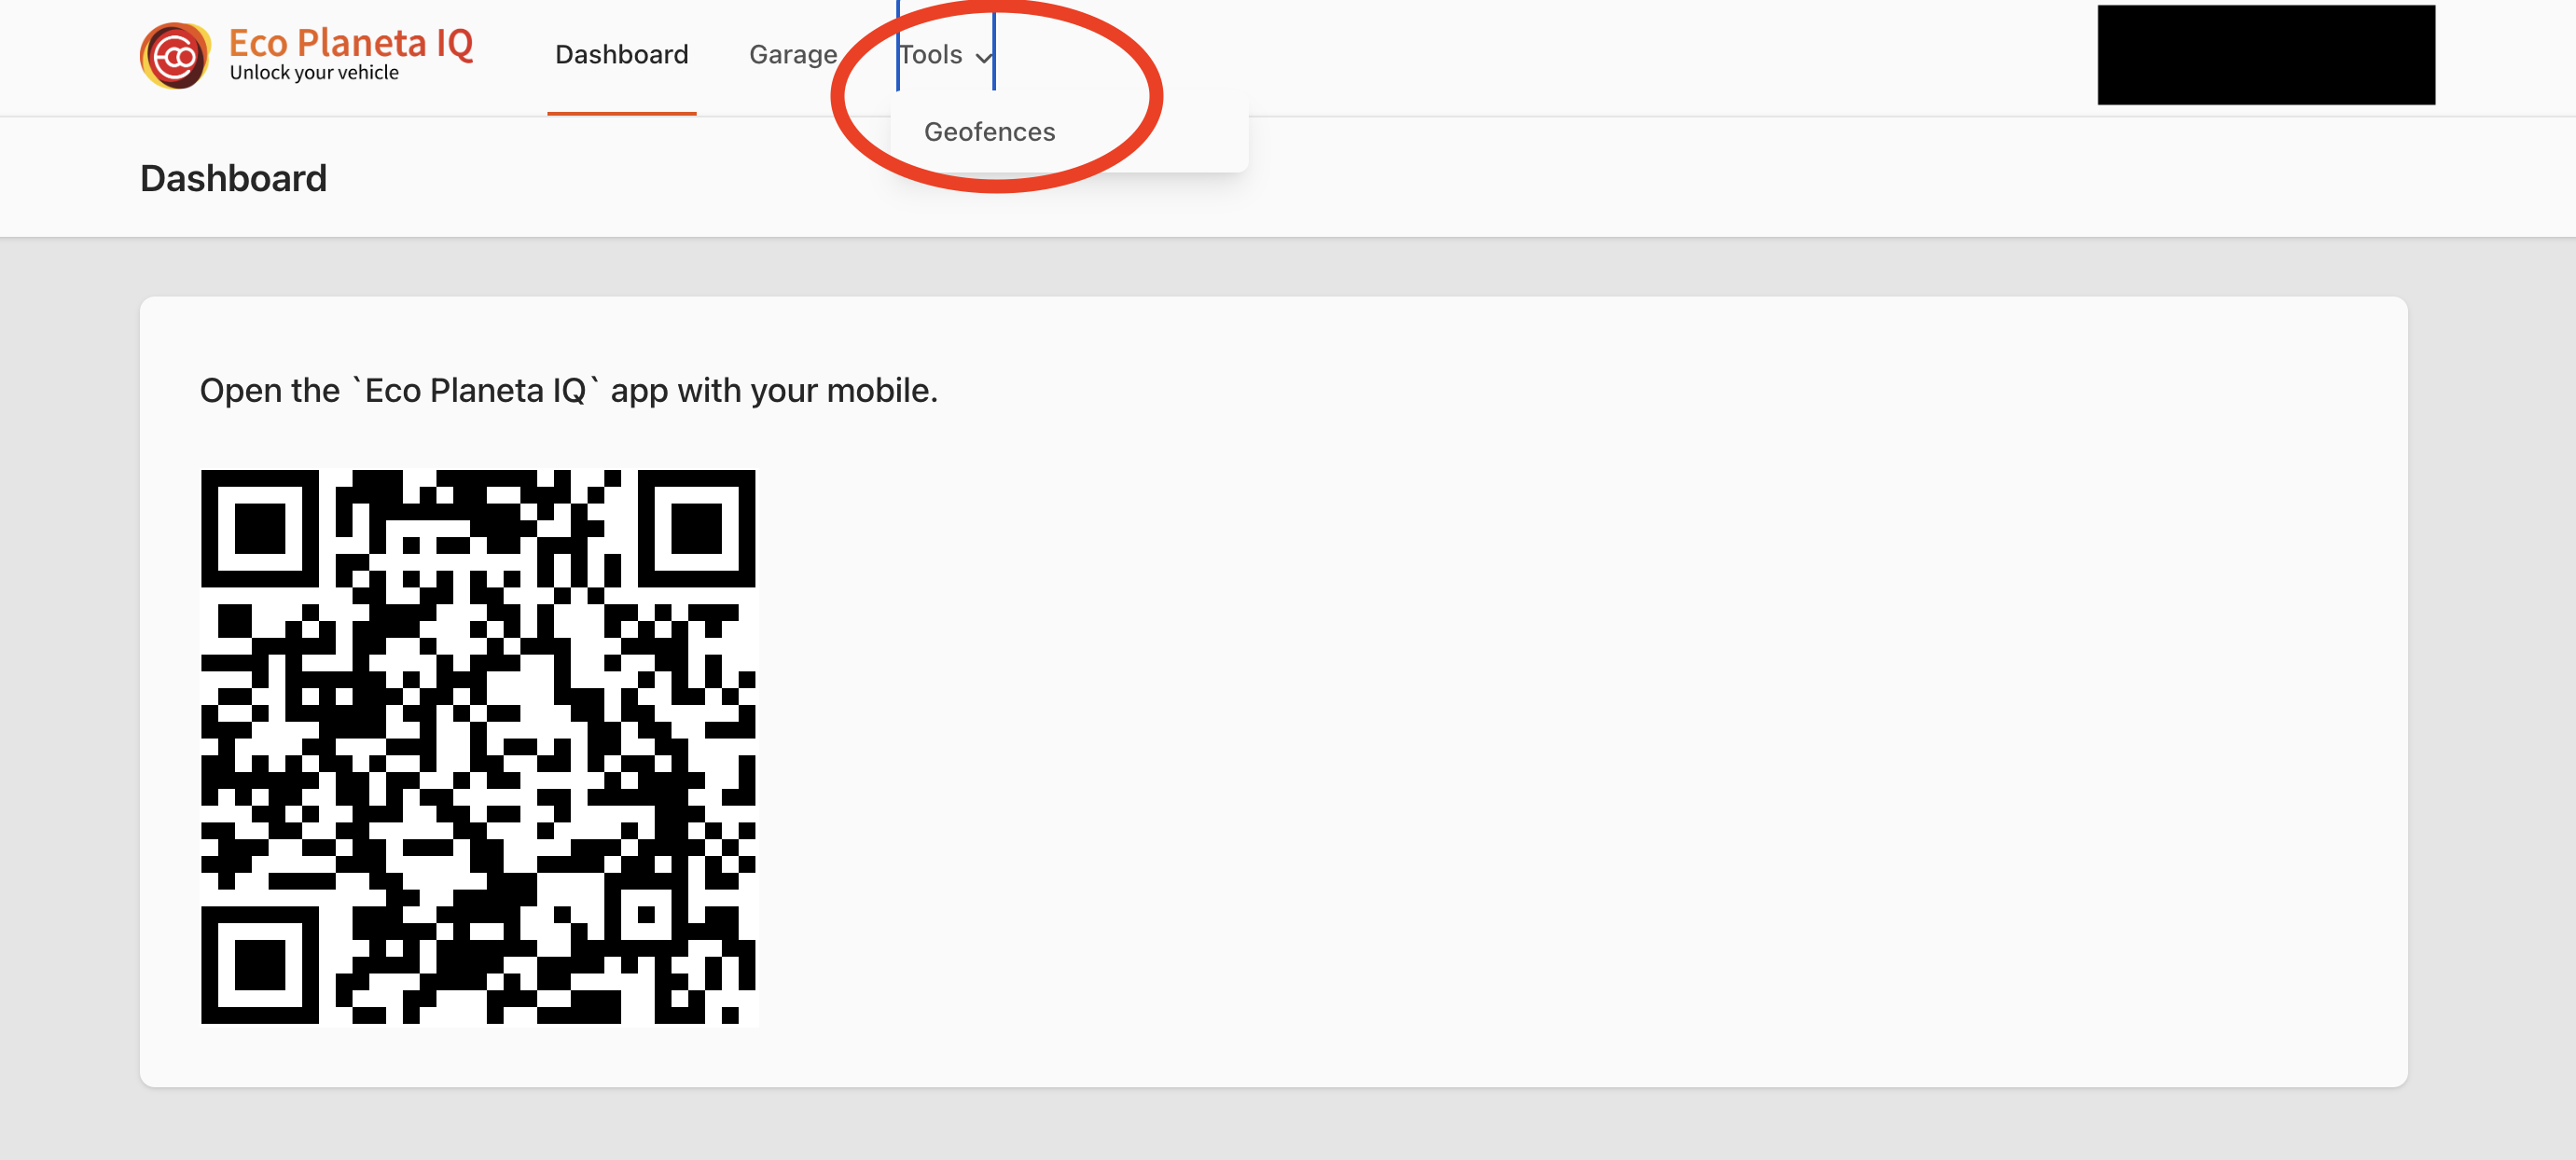
For Regular User Account
Please not that you have only access to this feature if you have an owner key of the vehicle.
Tools > Geofences
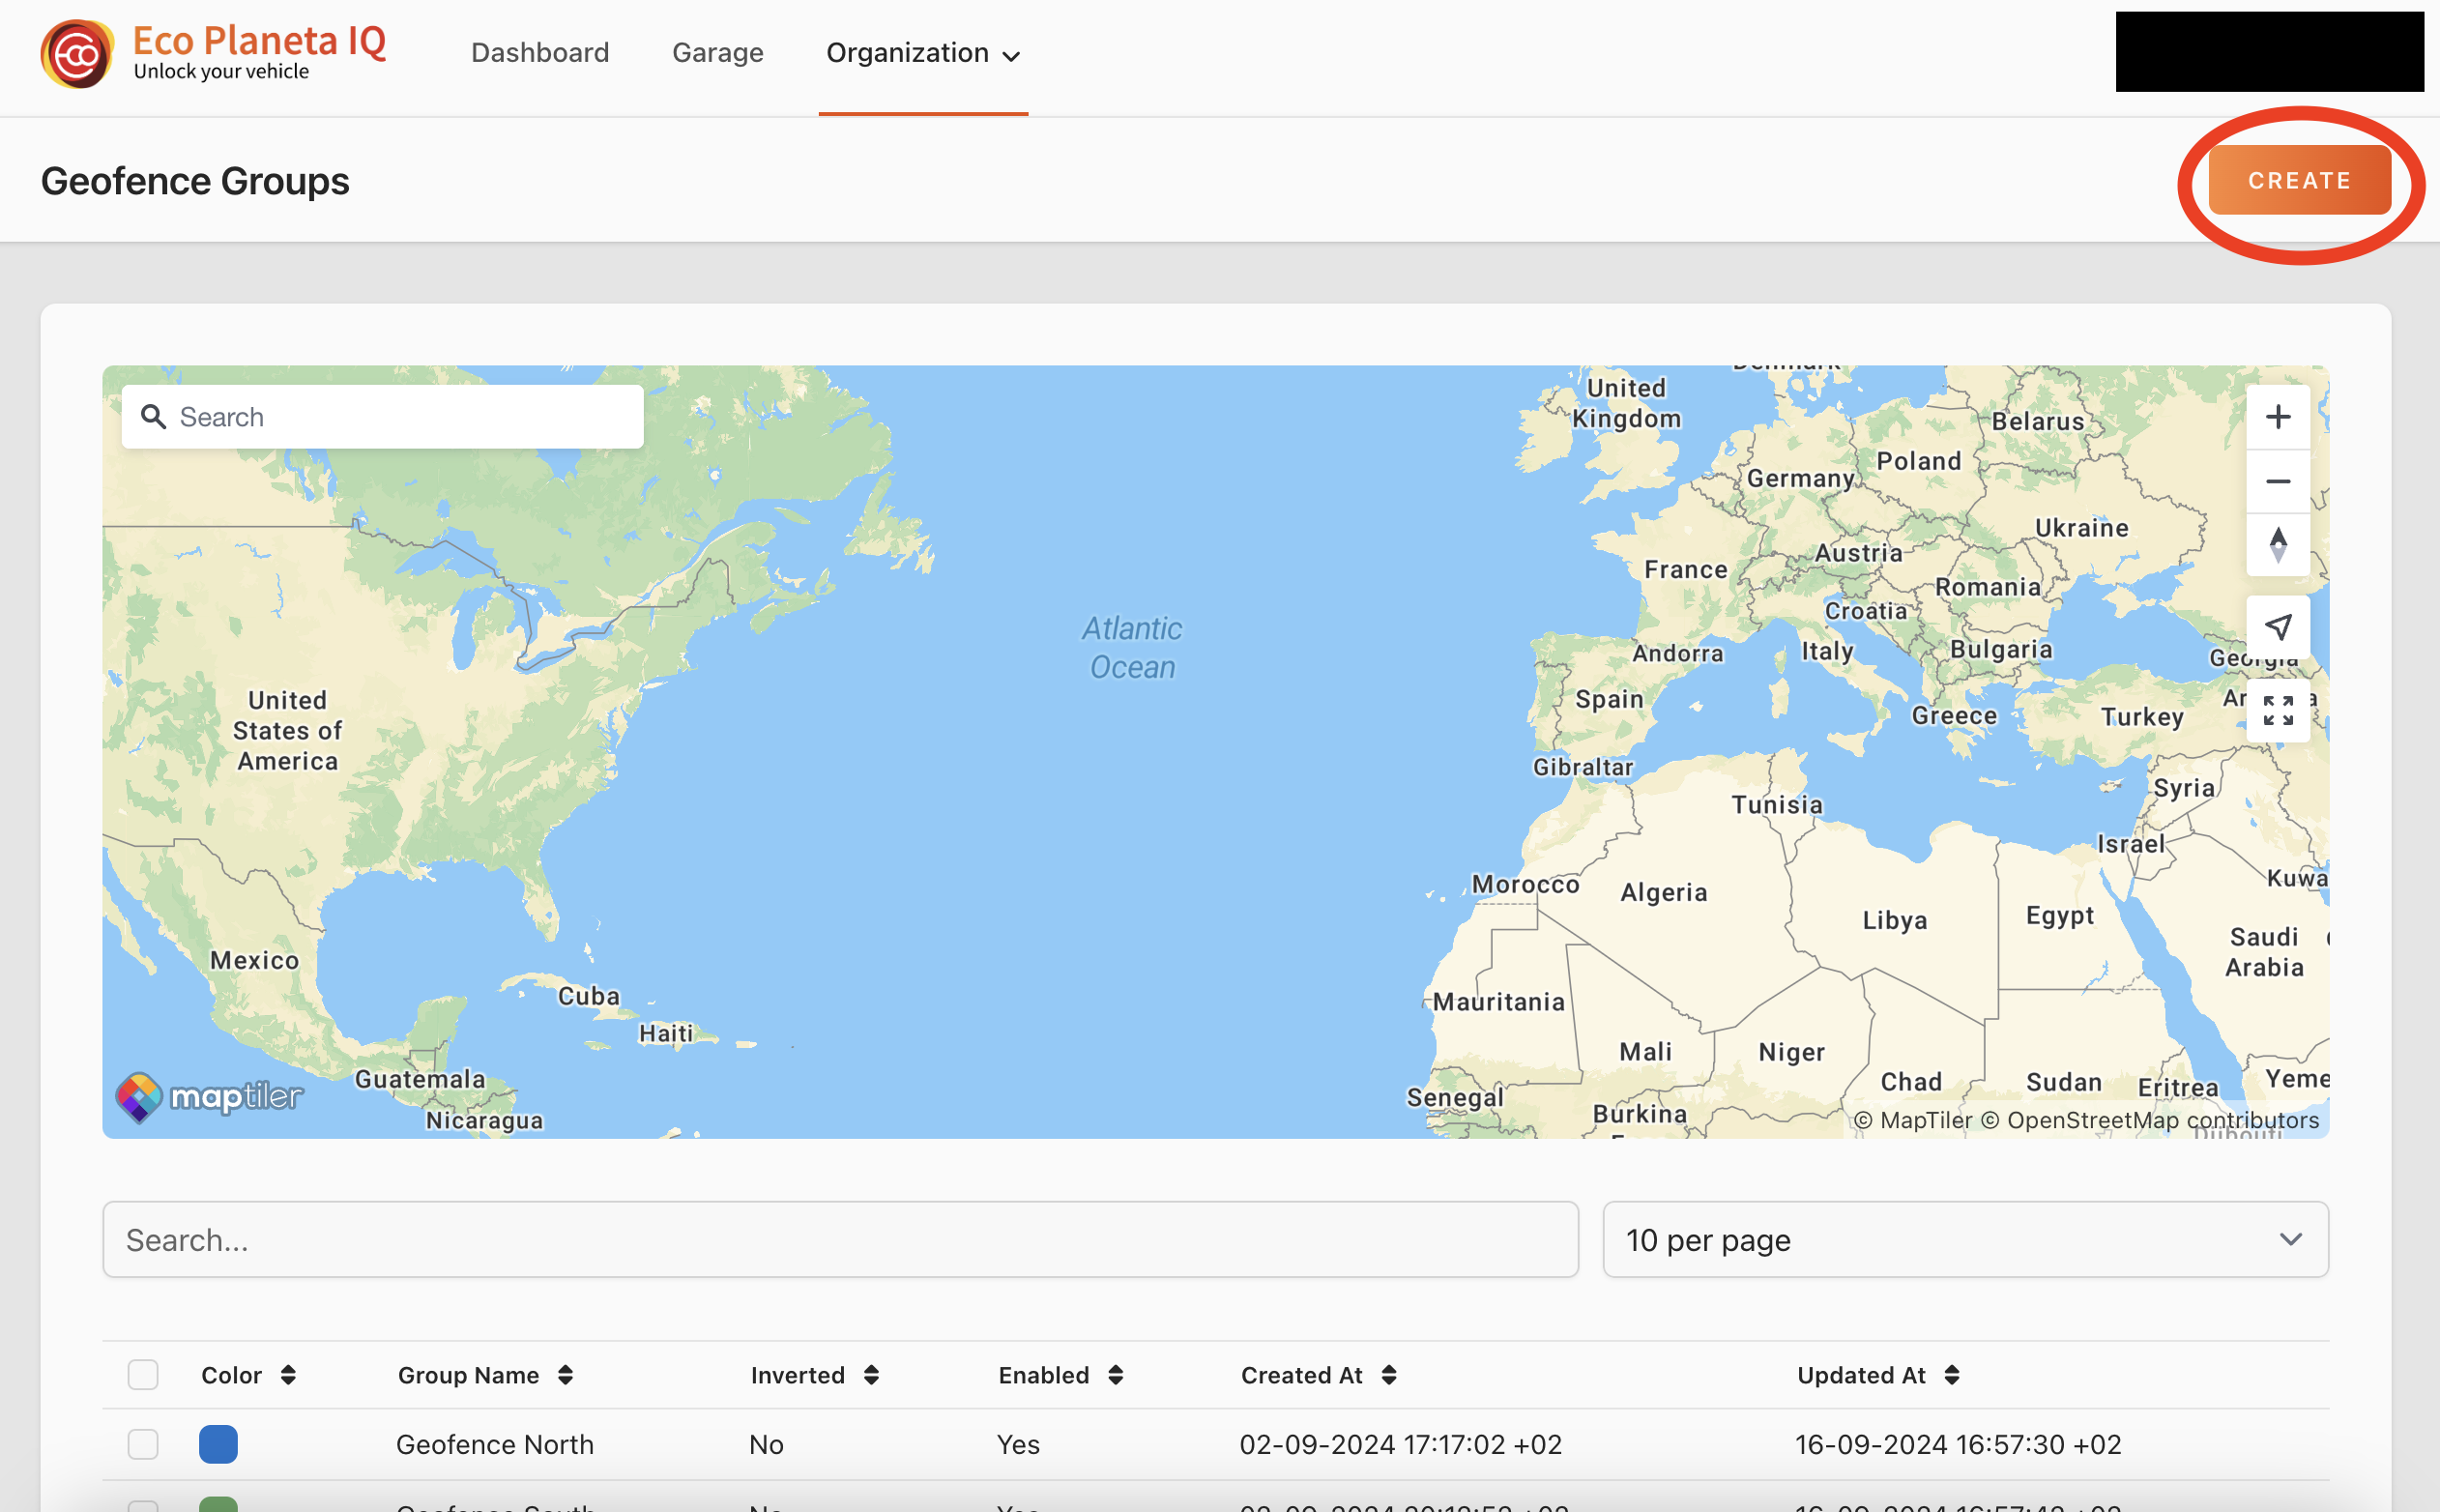
Geofence Groups
One Geofence Group consists of one or more Geofences.
Create Geofence Group
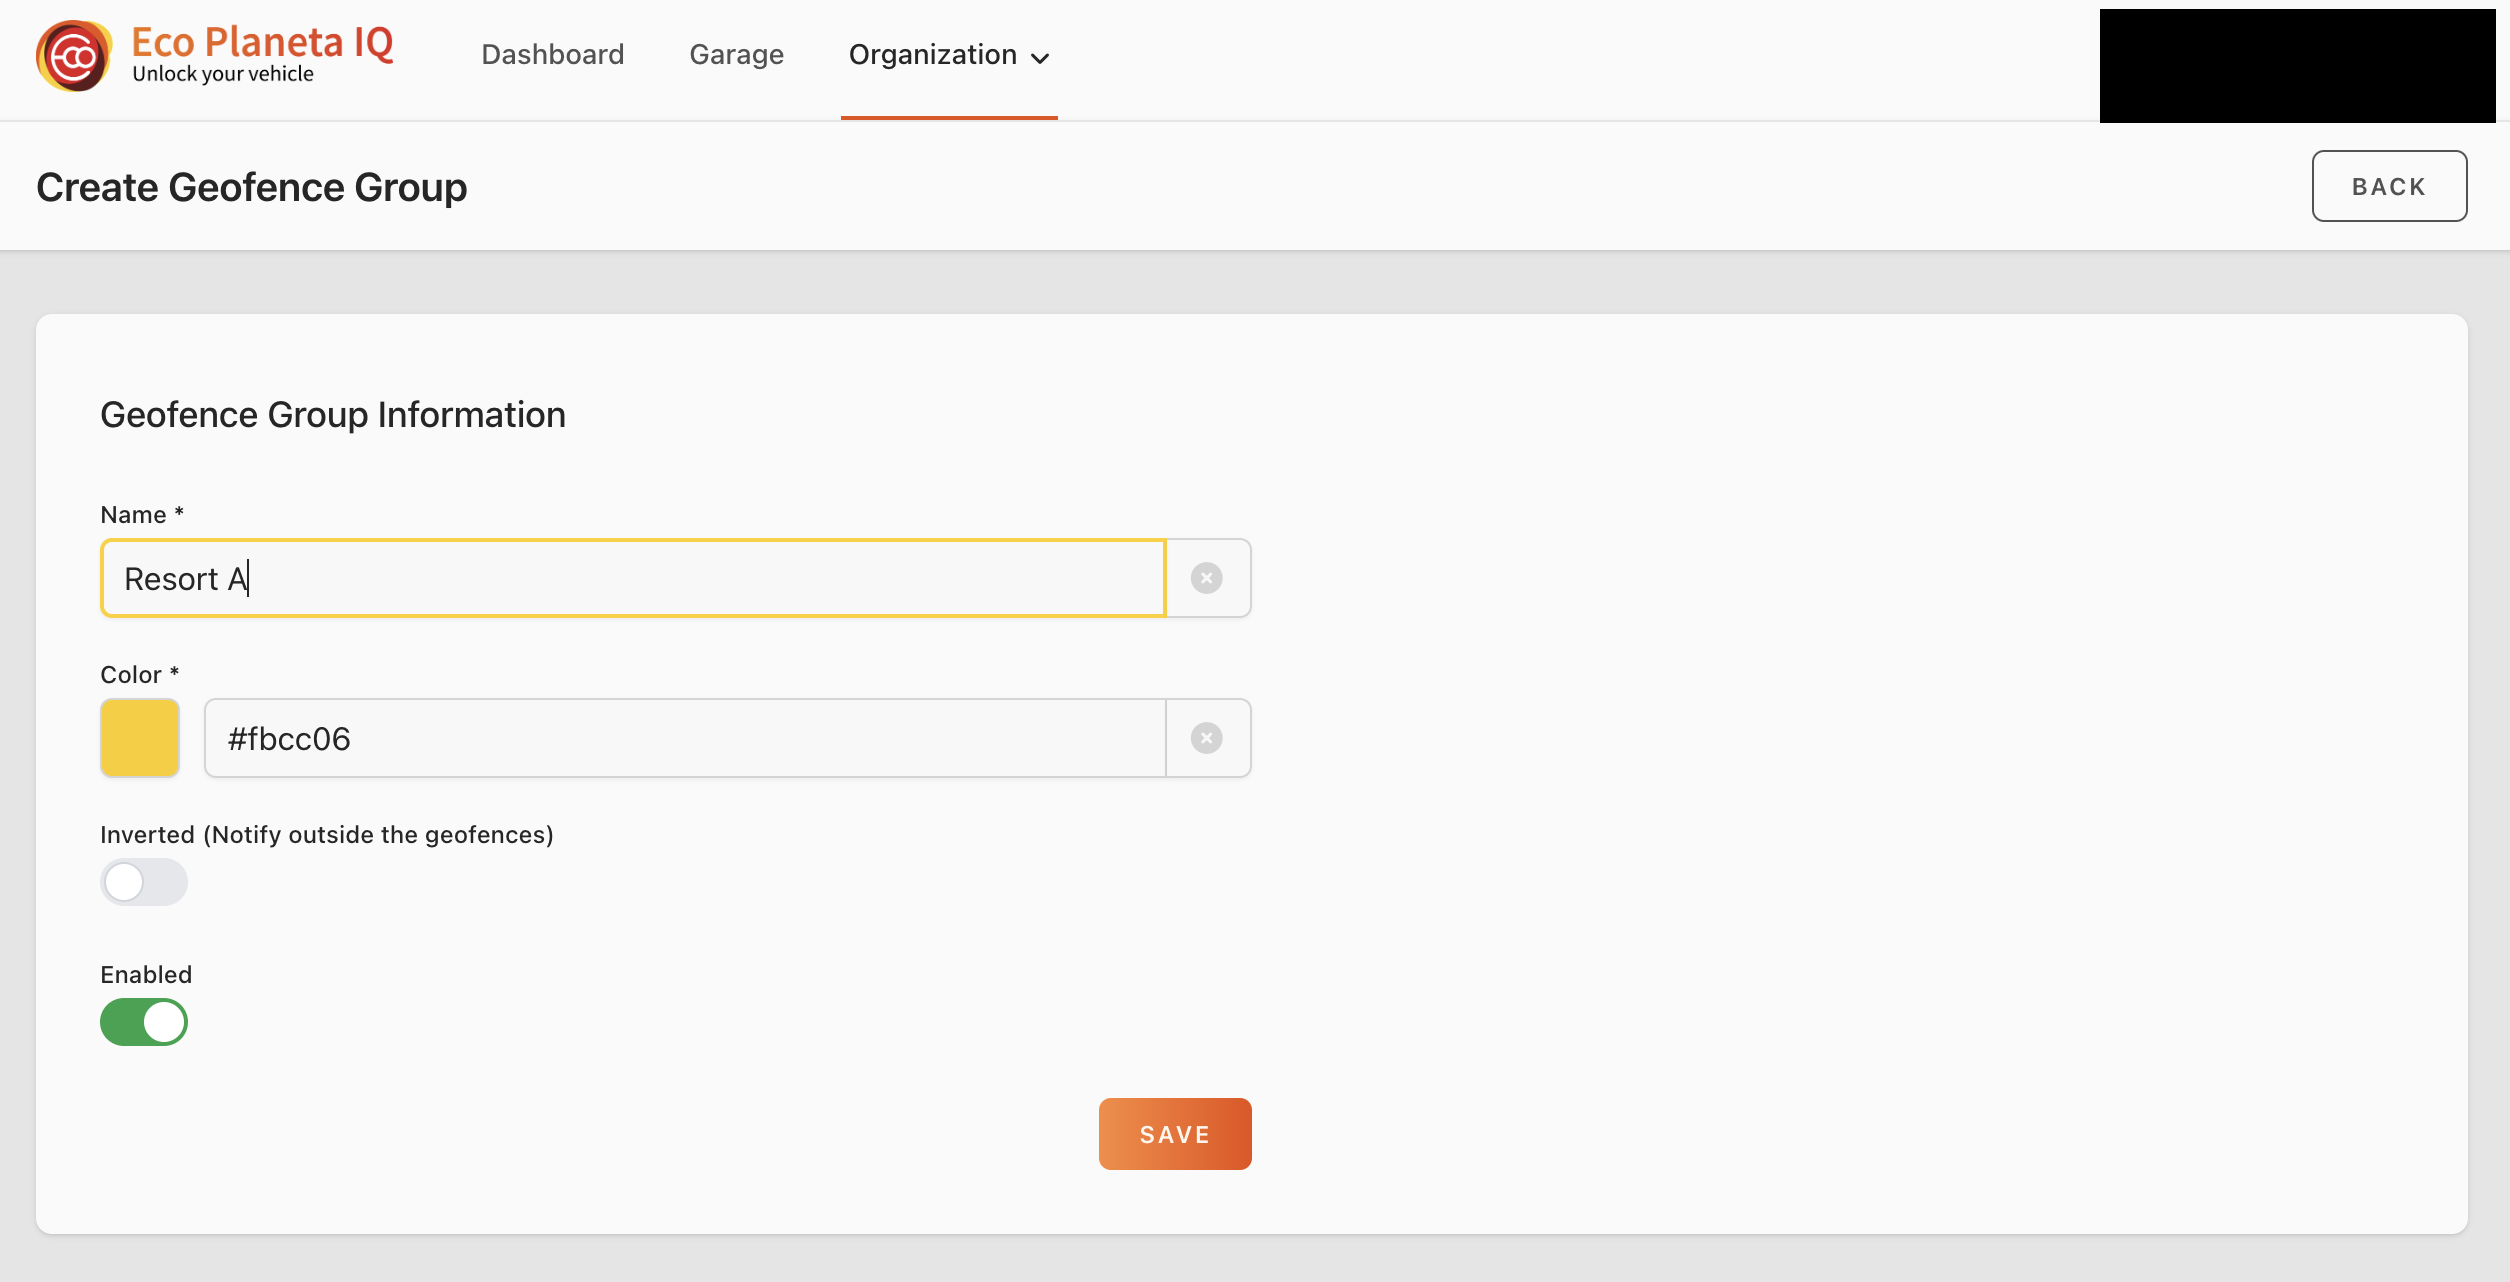
Name and Color
Create a unique name and select a unique color for easy identification of your Geofence Group.
Inverted
If you want to create a Geofence Group with inverted Geofence, you have to make sure to enable it on group level. You can enable inverted geofence only on the group level. That means Geofences in a Group are always all inverted or all non-inverted.
Enable
If you want to activated all Geofences in your Geofence Group you have to make sure that your Geofence Group is enabled.
Geofence
Geofence Group > Geofence
Create Geofence
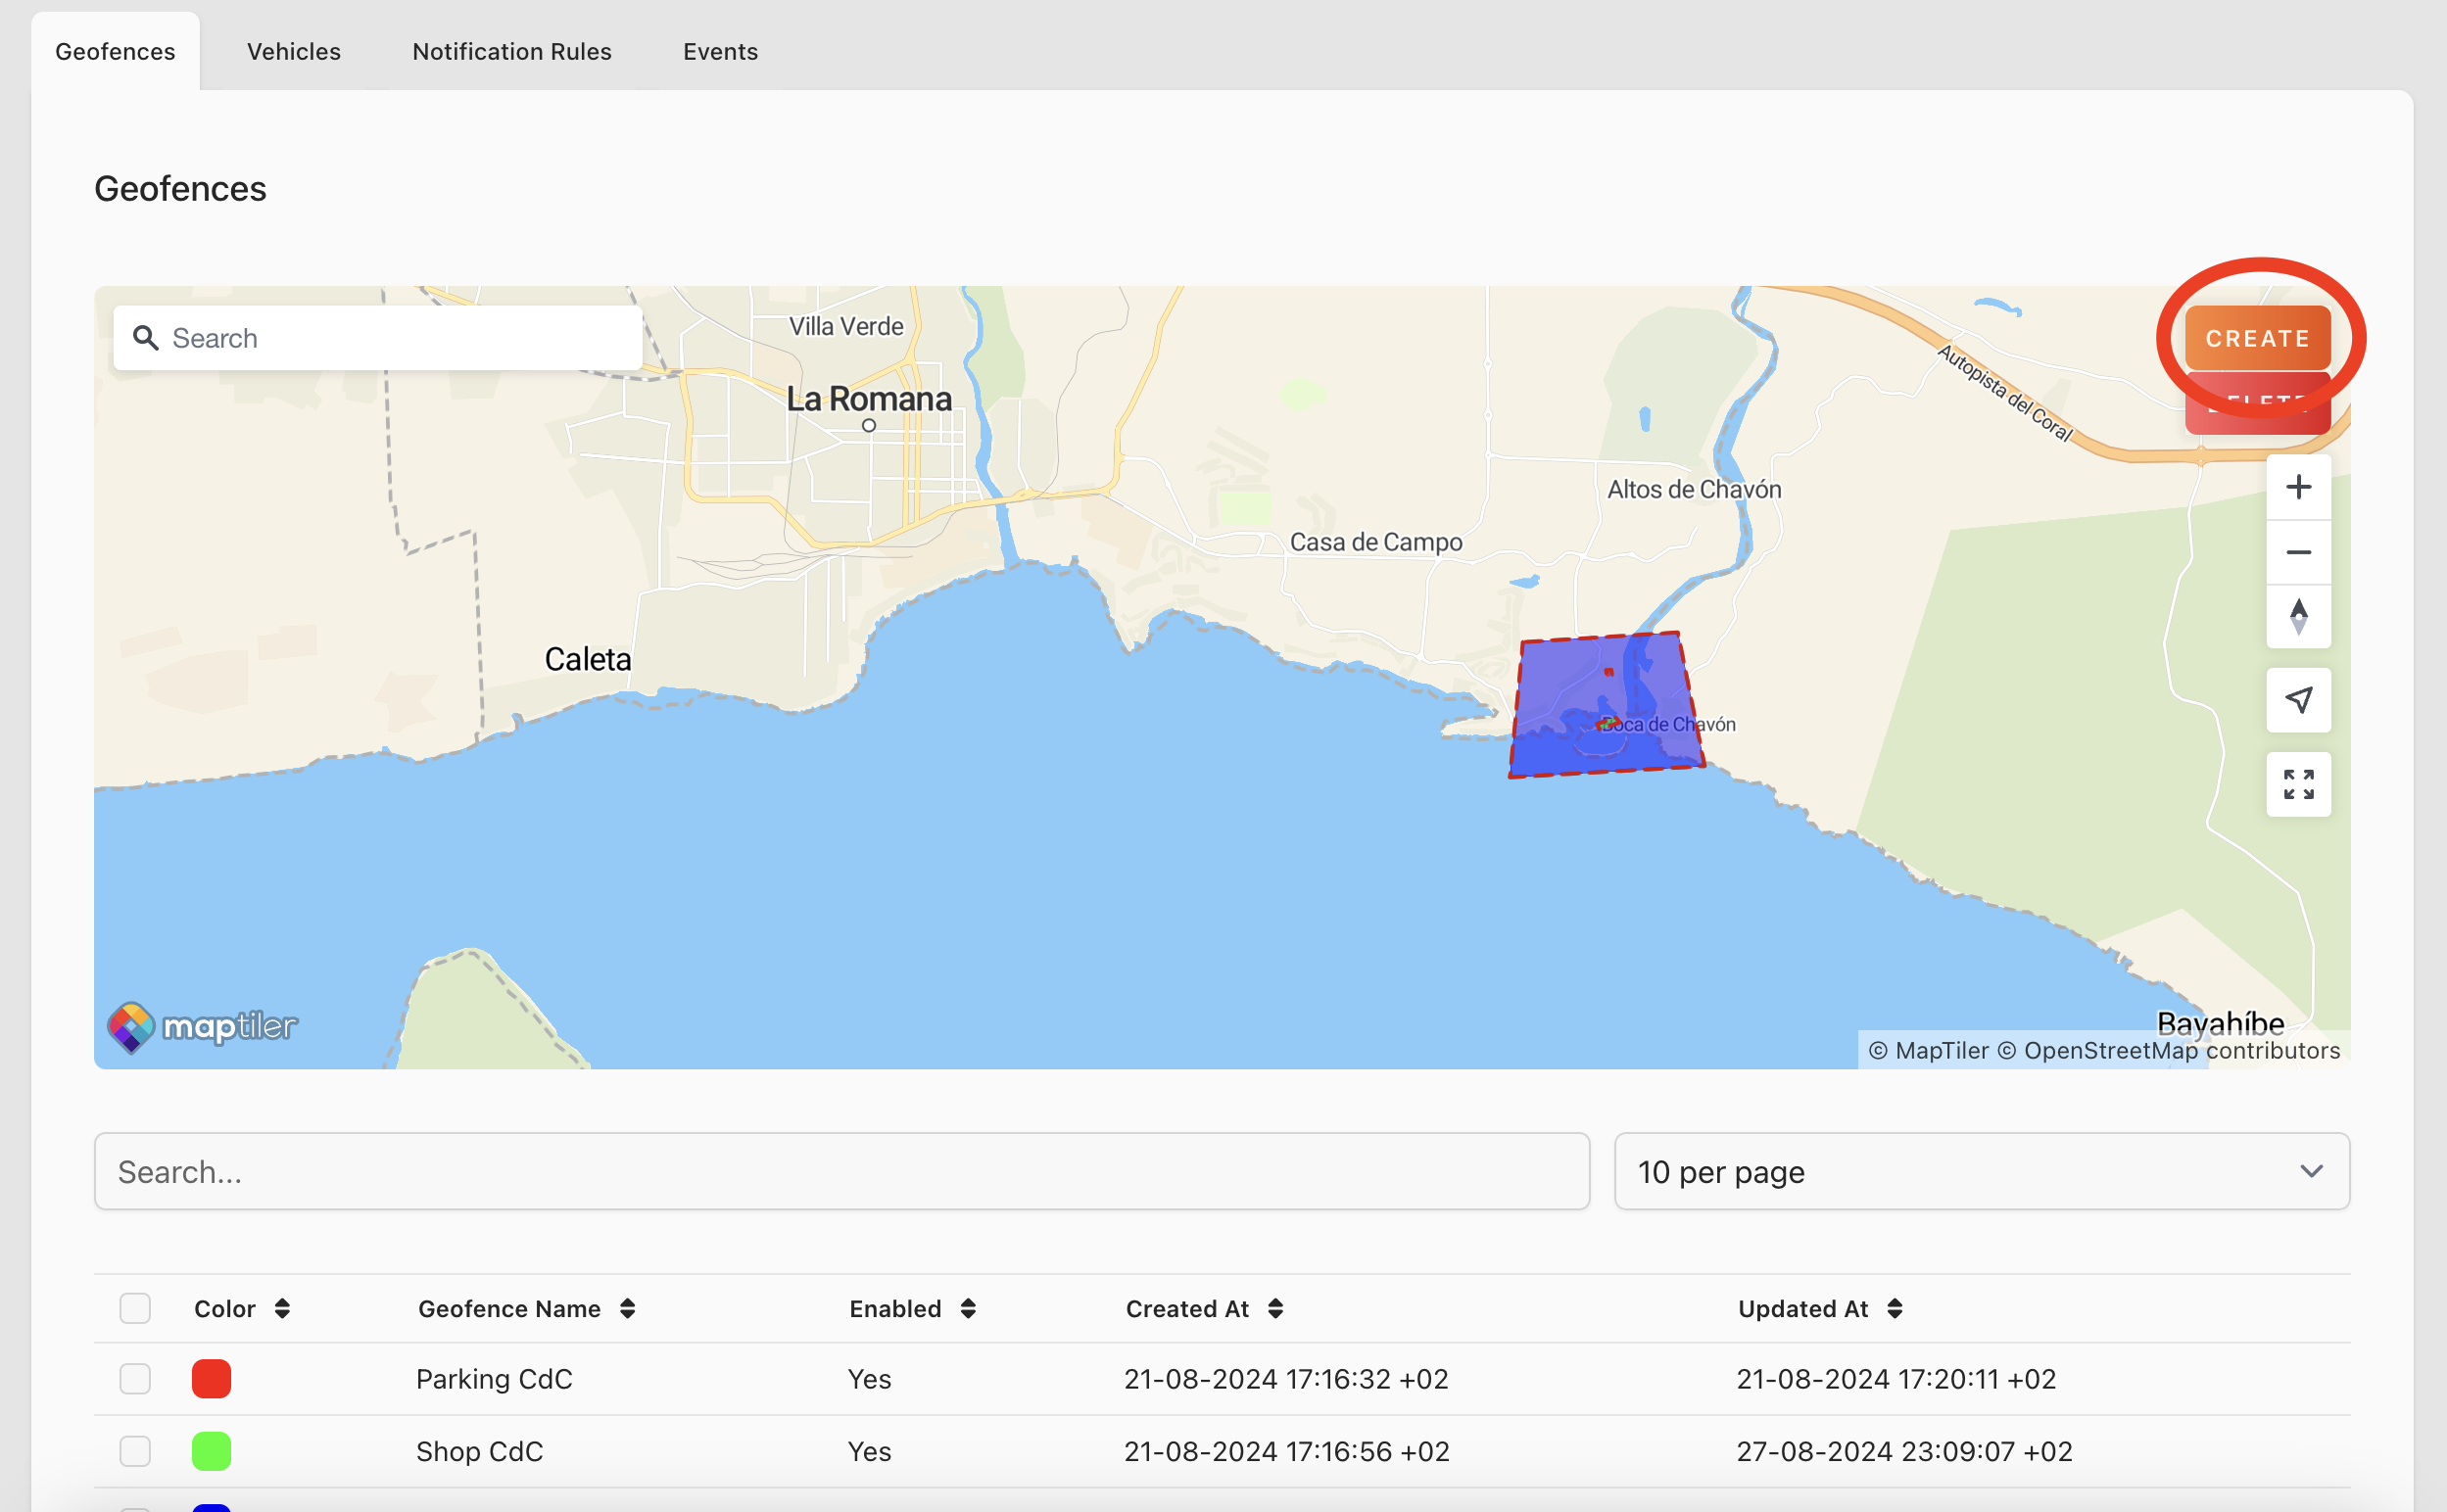
After you have clicked the create button you can click anywhere on the map to generate the first point of your new Geofence.
When you are done creating all the points of the Geofence, you can click on the last point that you have added to save the Geofence.
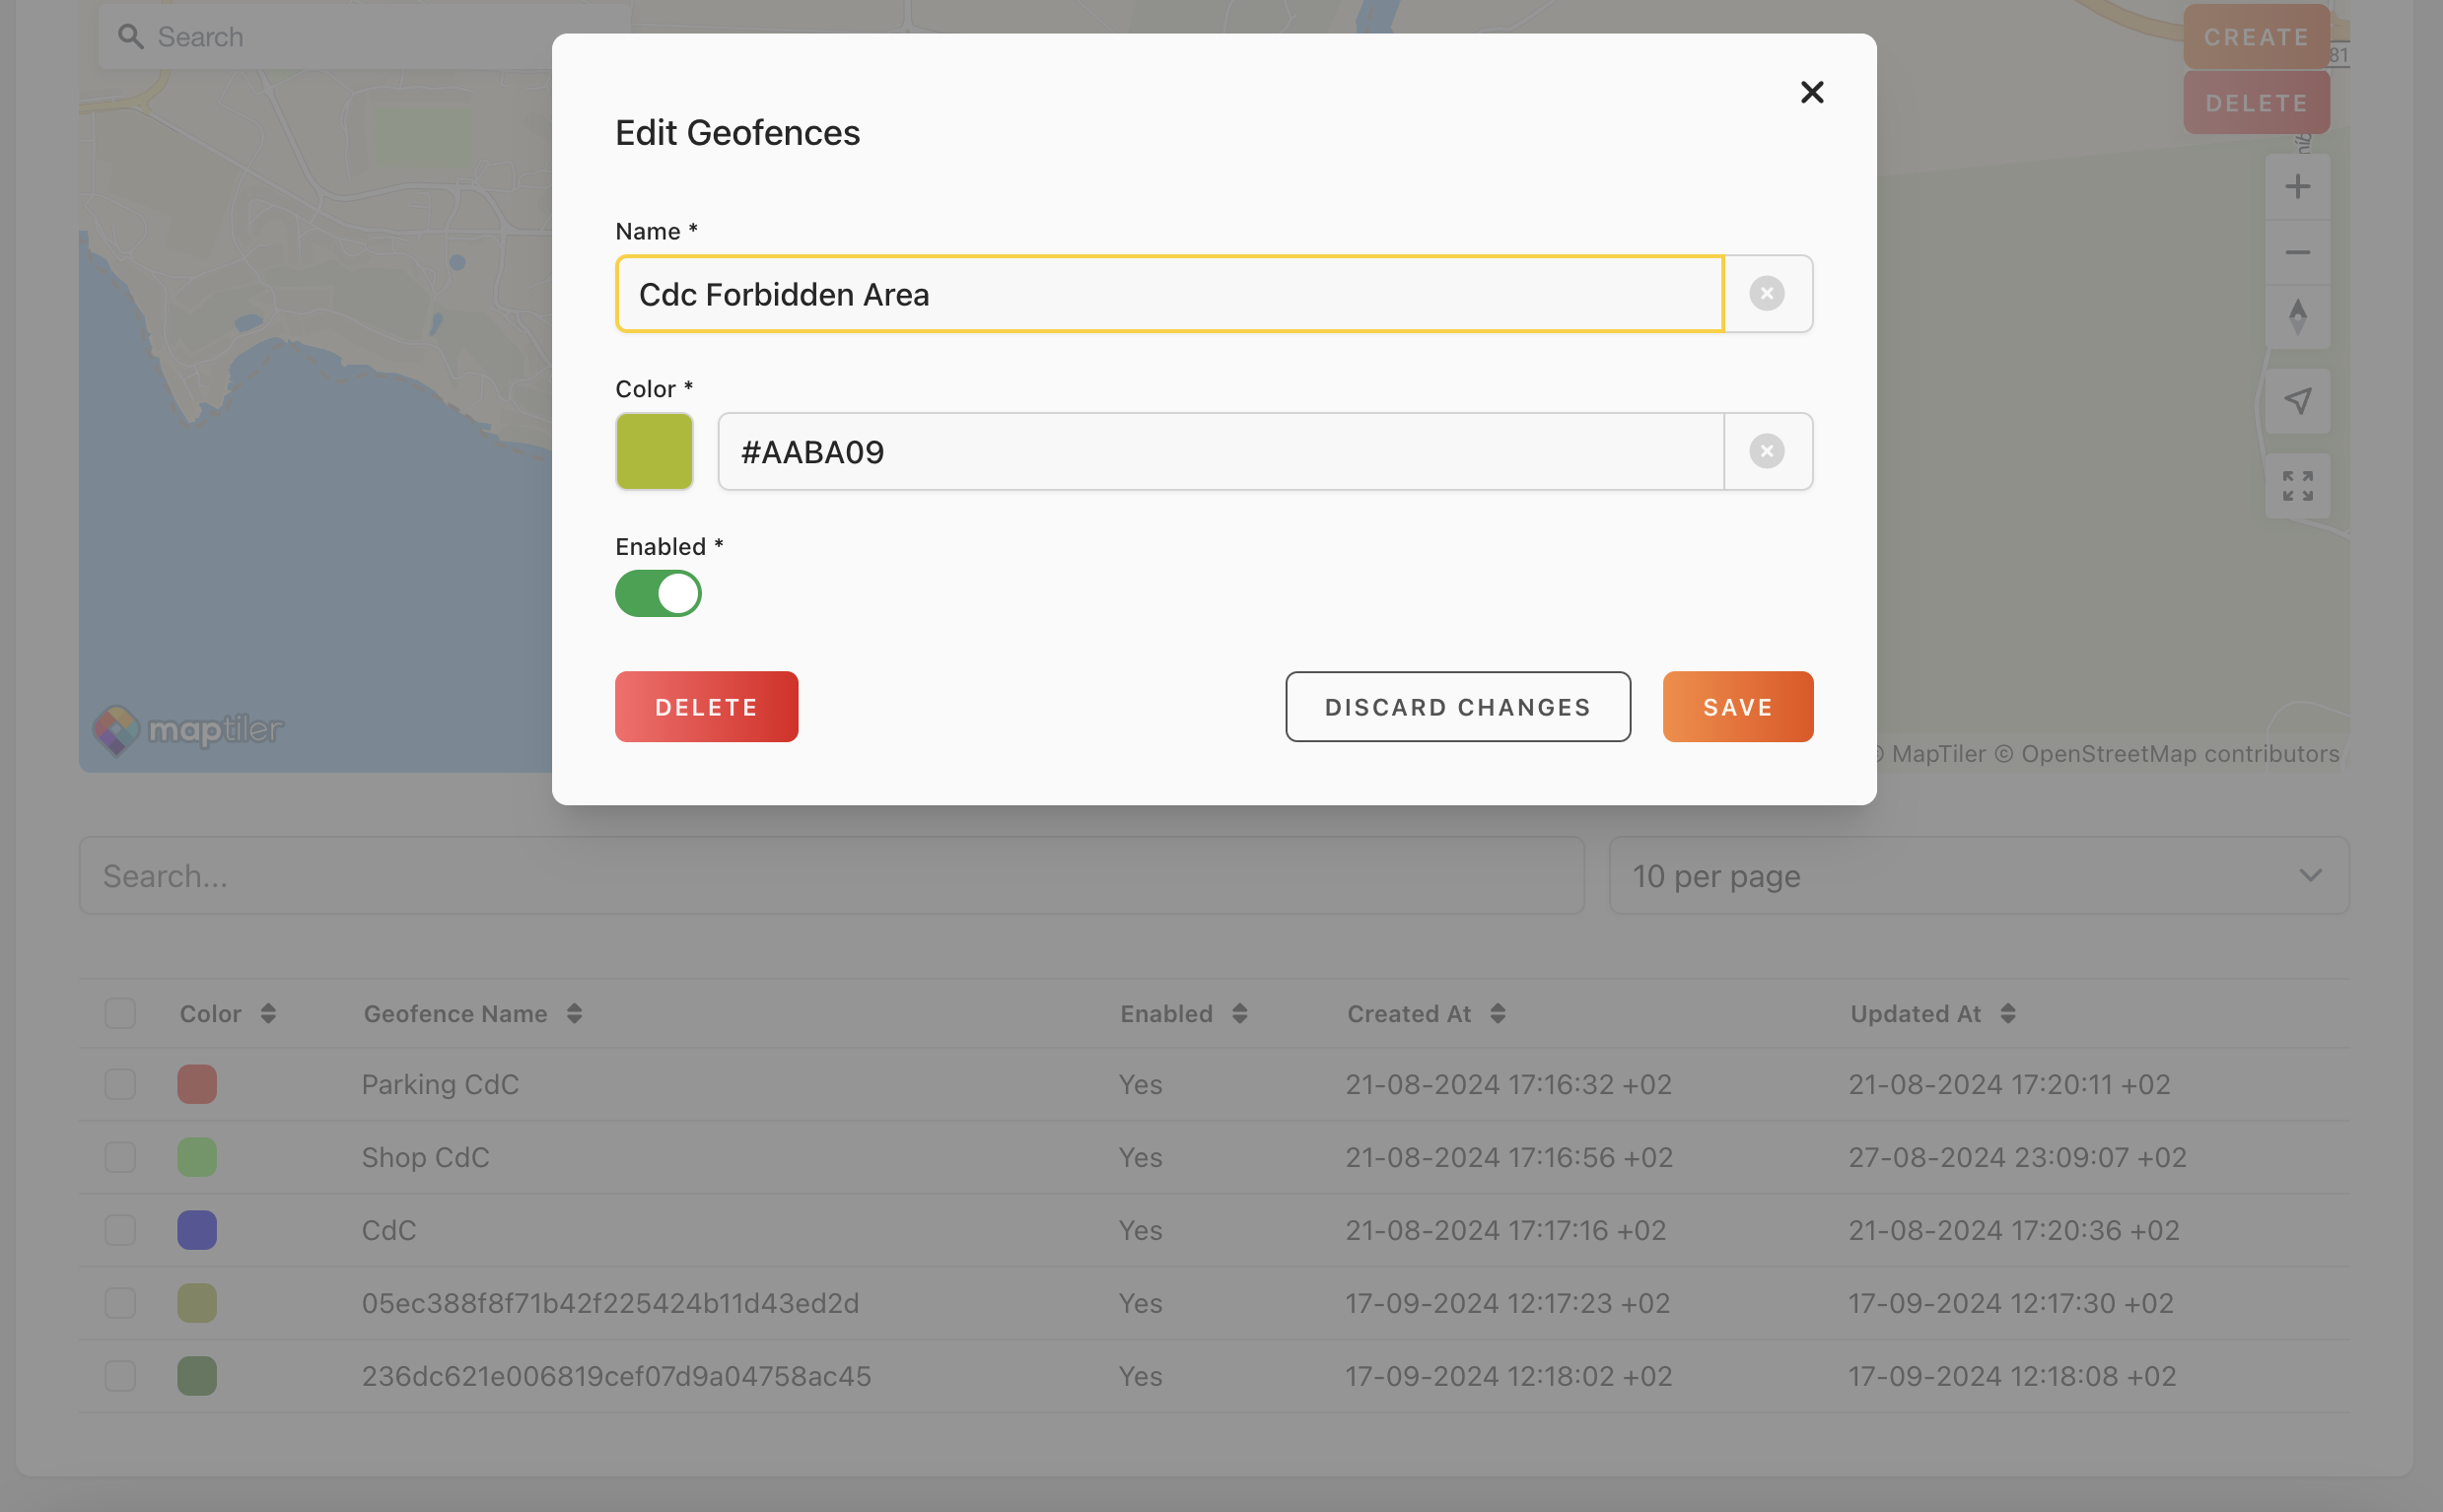
The Geofence is saved with a random name in the Geofence table. To change the name and/or the color you can click the geofence and in the popup form you can make your changes. Here you can also enable or disable the selected geofence.
Edit Geofence
To edit a existing Geofence you click the specific Geofence in the Map overview. You can grab existing red points or you can create new point (click on the small orange points) to expand a Geofence. If you want to move a Geofence you need to grab it in the middle of the Geofence. Each time you make an edit to the Geofence, you will get a notification popup that the Geofence is saved.
Delete Geofence
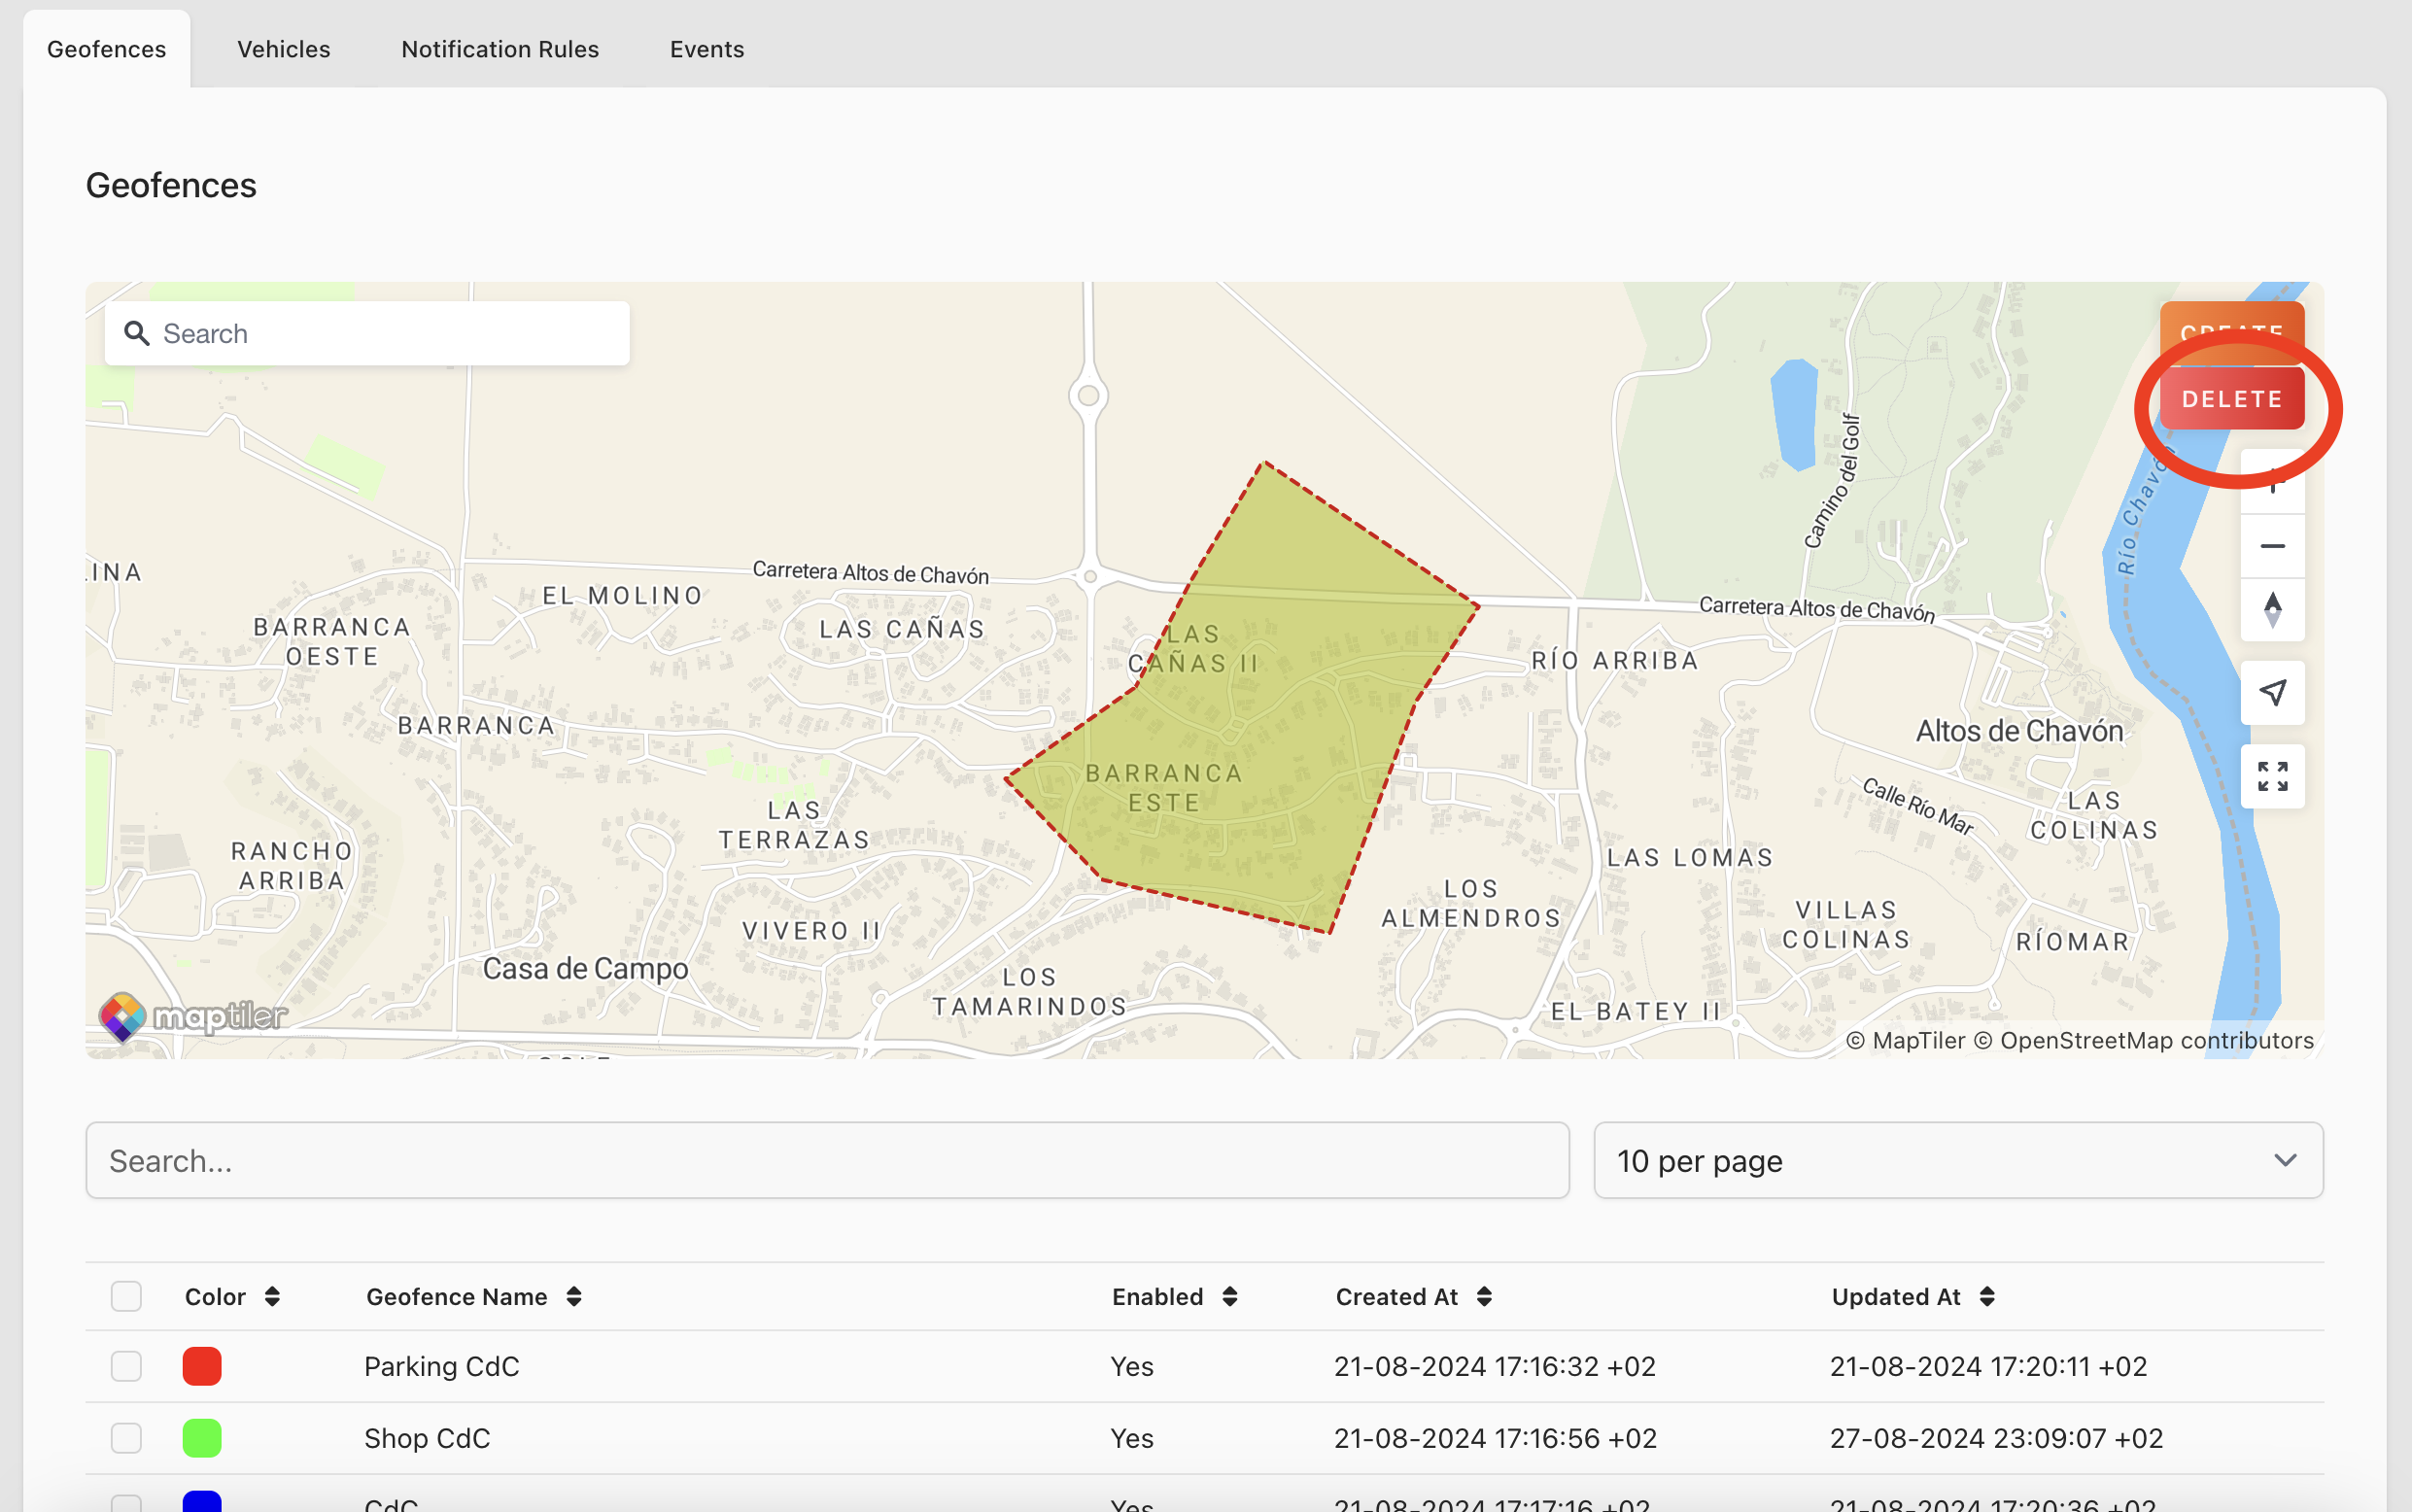
To delete a Geofence you click in the middle of the Geofence and click the Delete button.
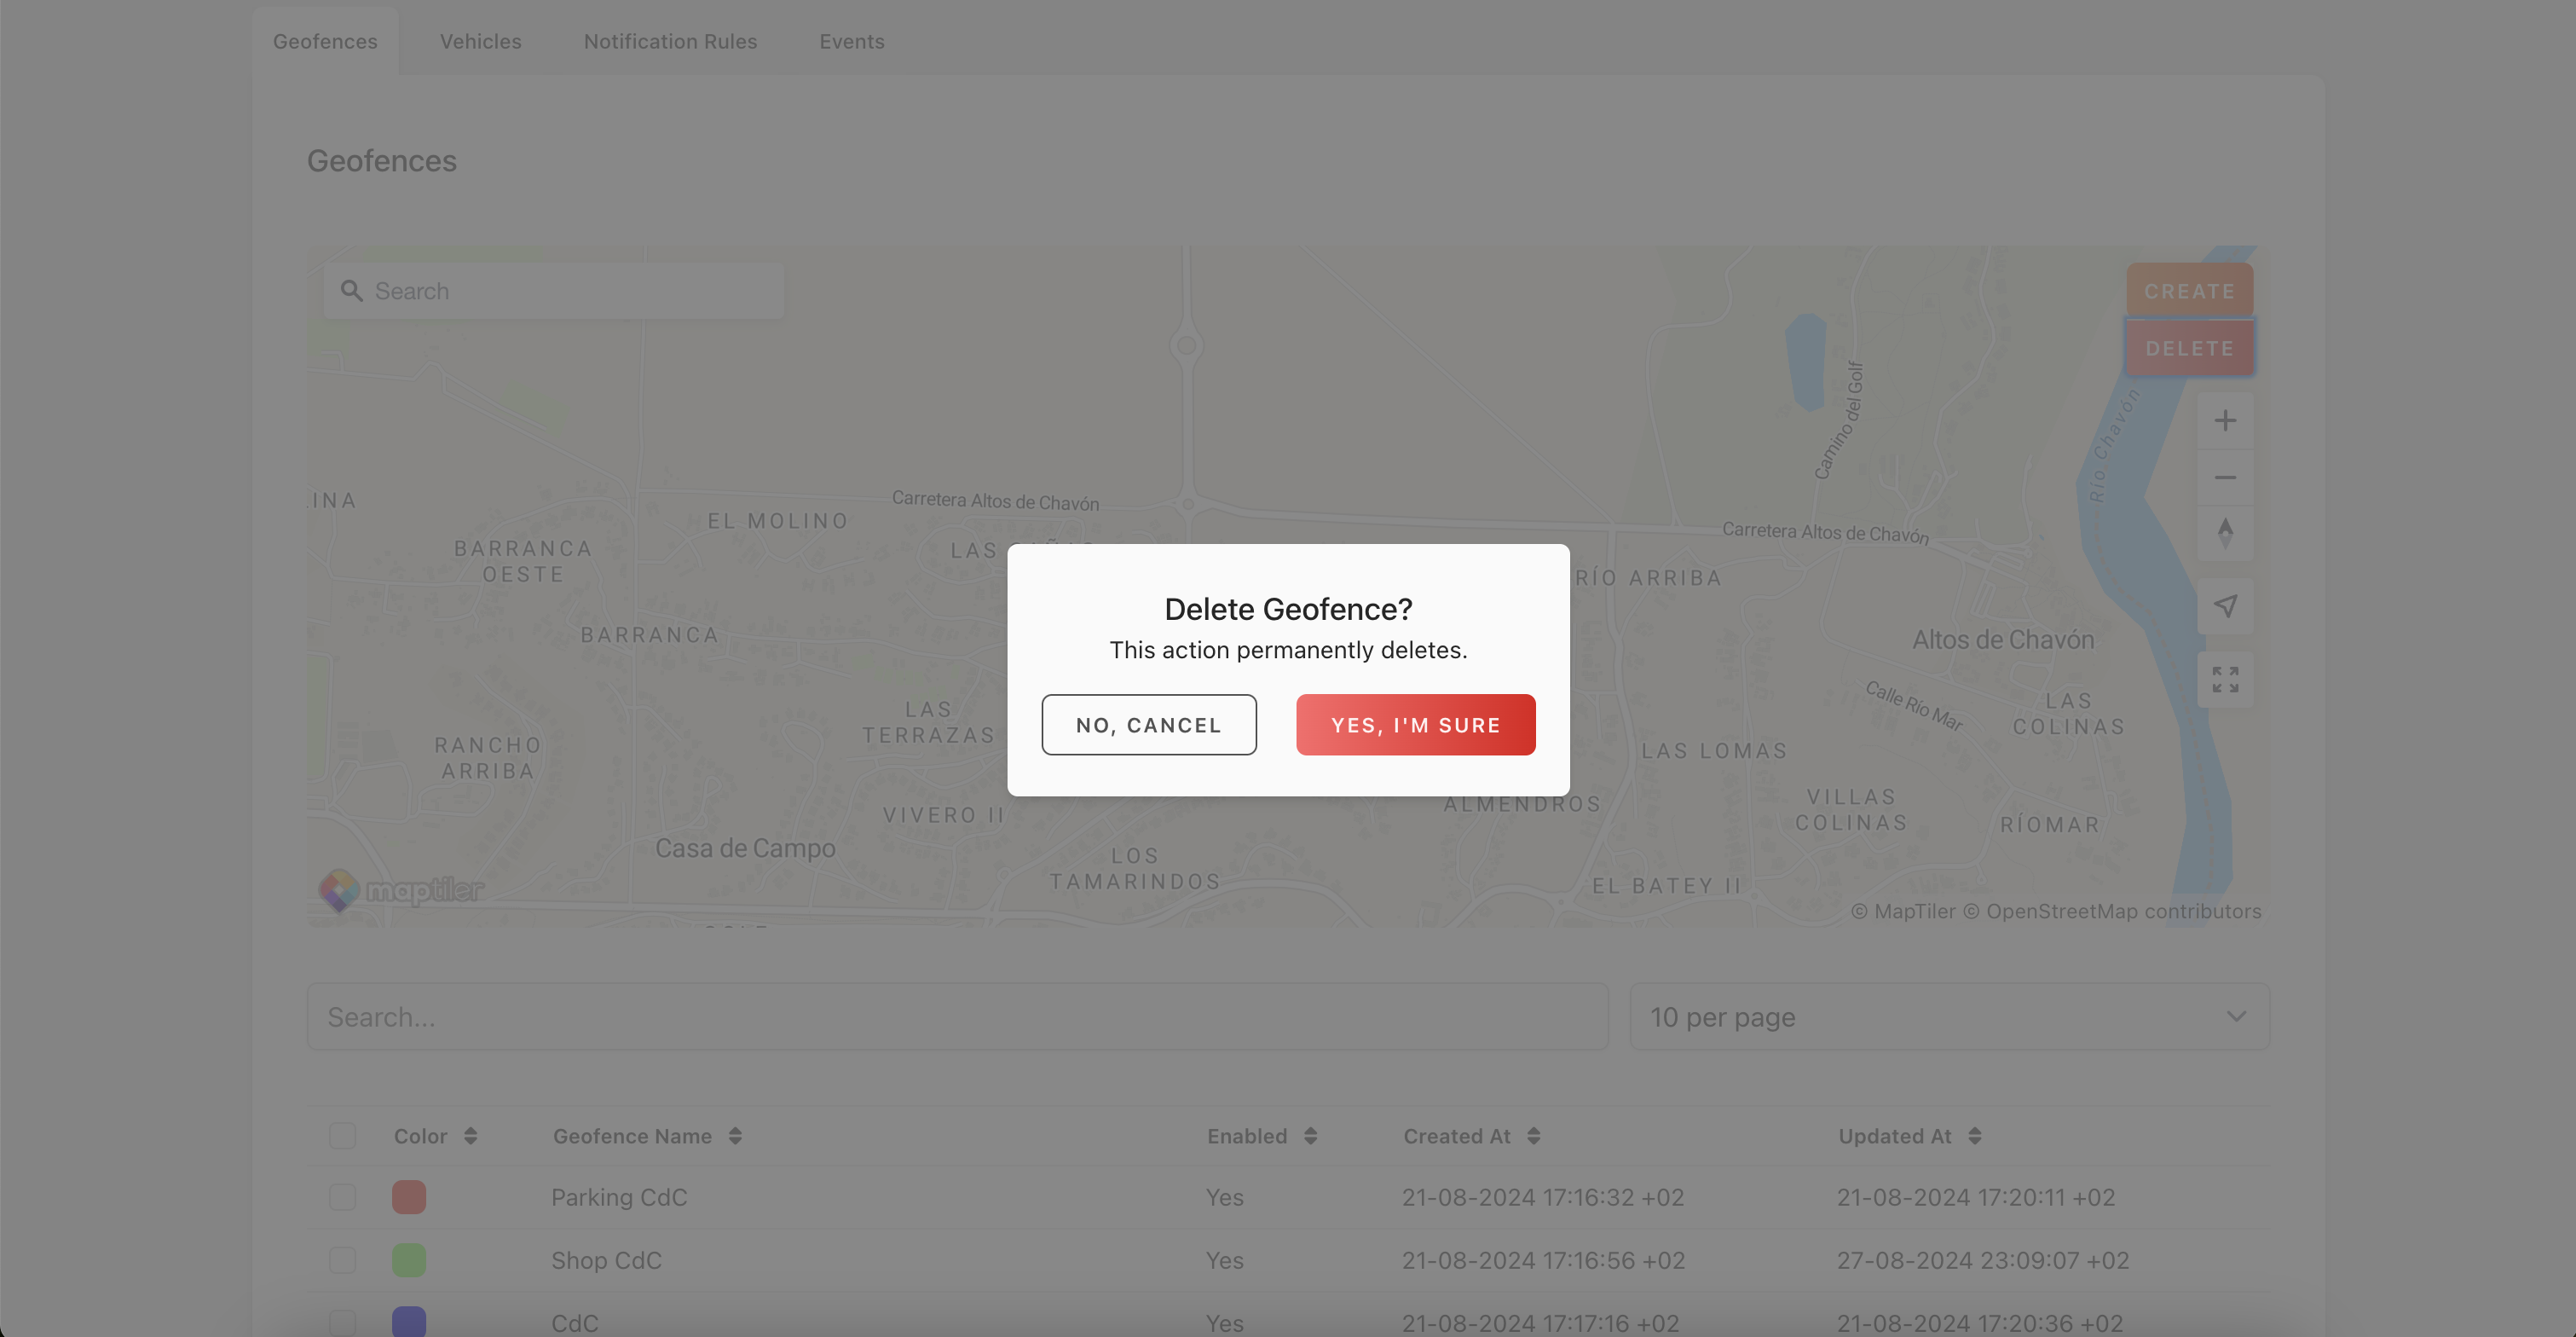
And then you confirm the delete action of the geofence.
Vehicle
Geofence Group > Vehicles
You have to specify which vehicles are part of the Geofence Group. If no vehicle is assigned, no notifications or events will be generated.
Assign Vehicles to Geofence Group
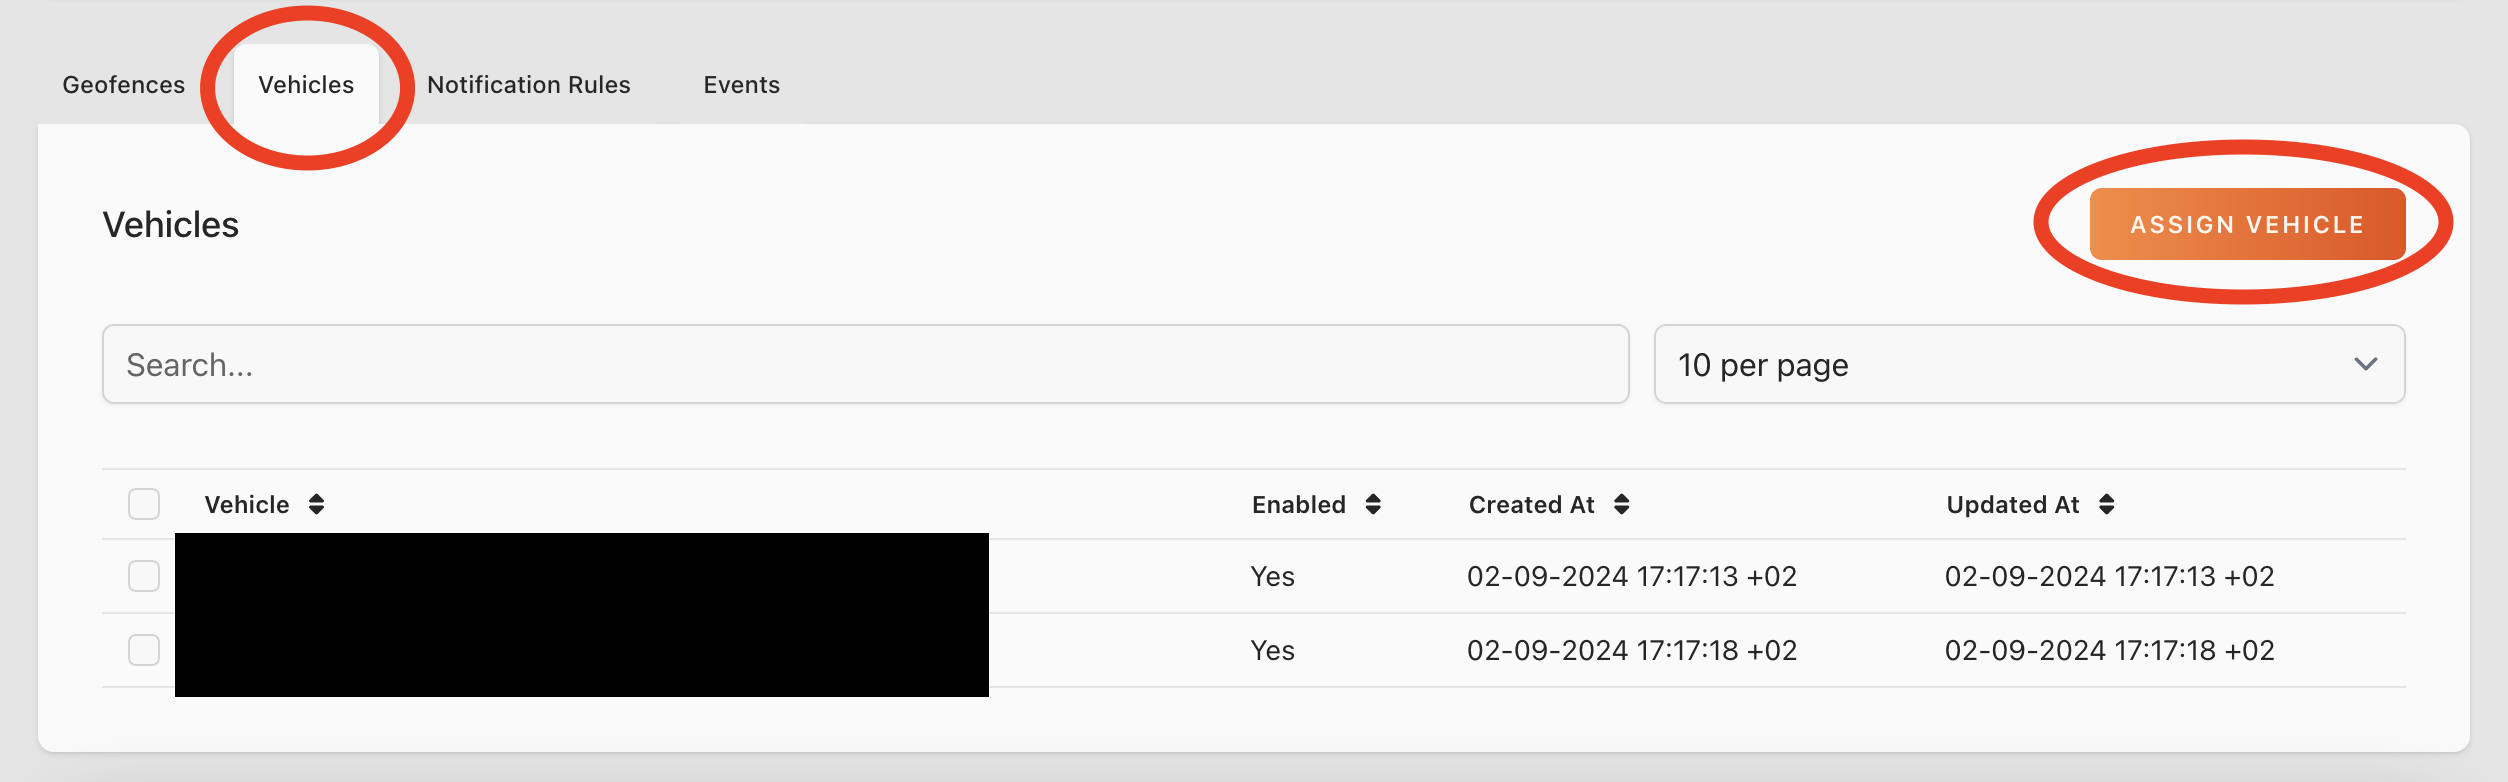
Click on assign vehicle to assign specific vehicles to your Geofence Group.
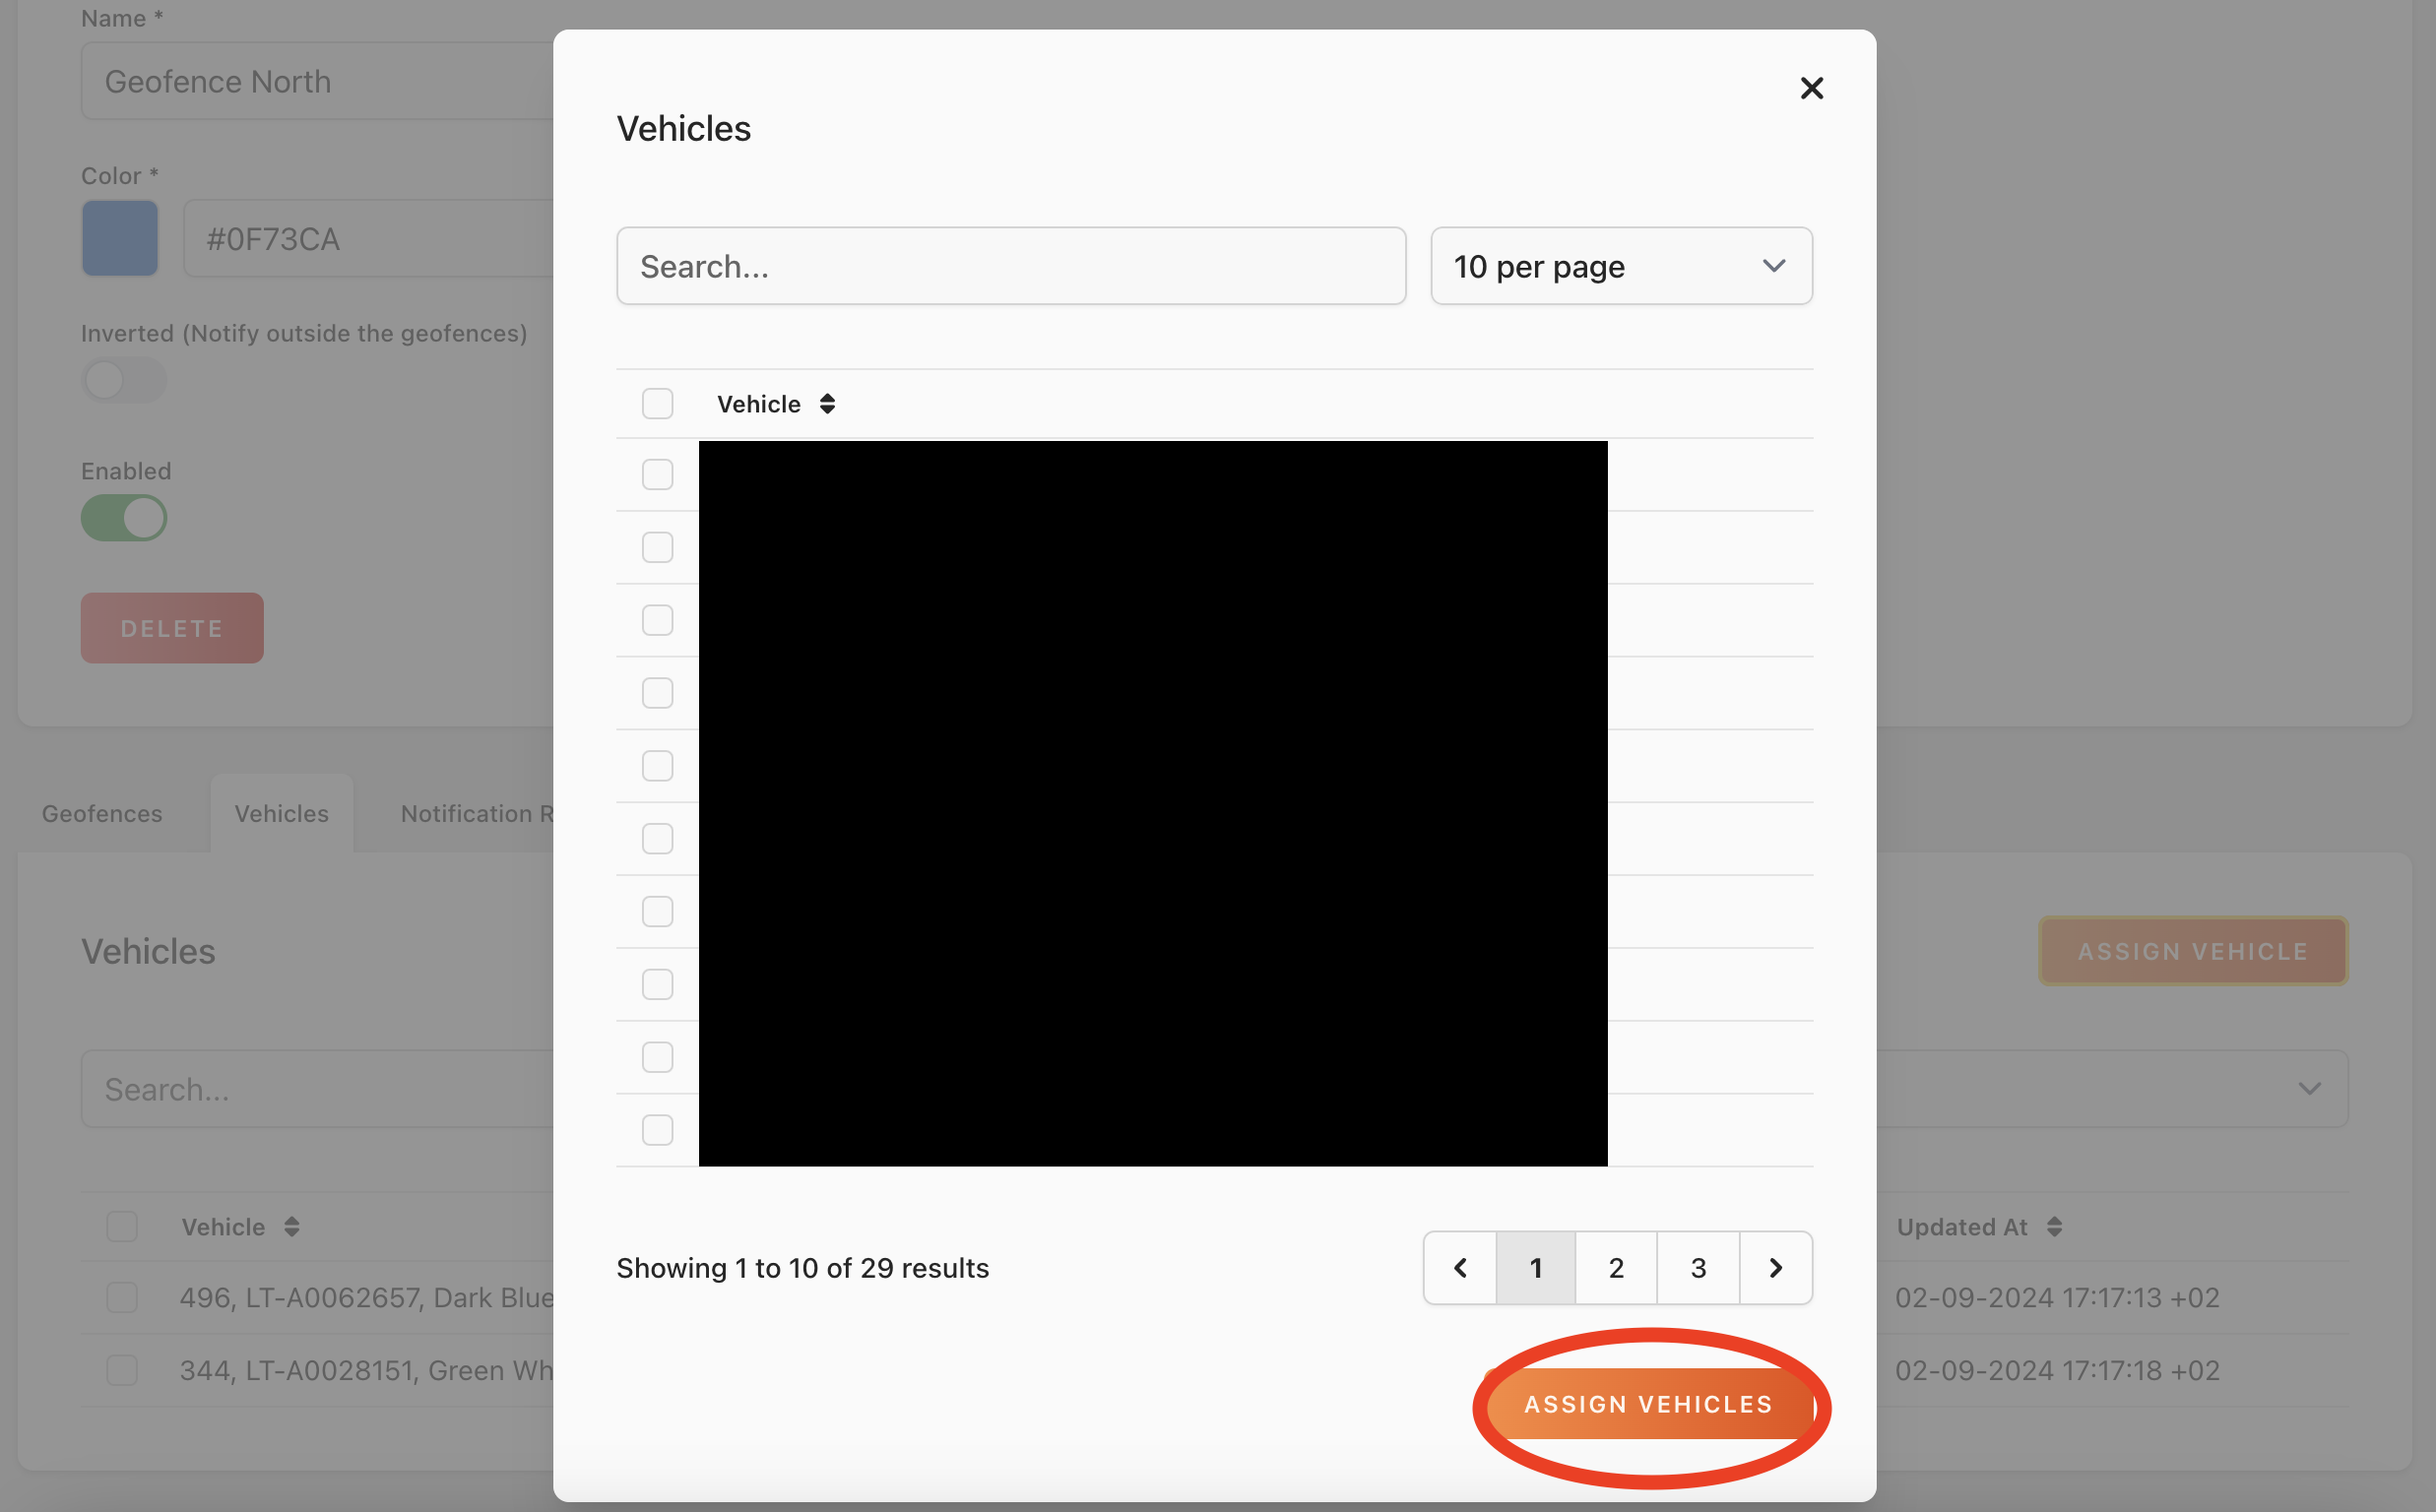
Select one or more vehicles by clicking the checkbox and the click Assign Vehicles when you are done with your selection.
Unassign Vehicles from Geofence Group
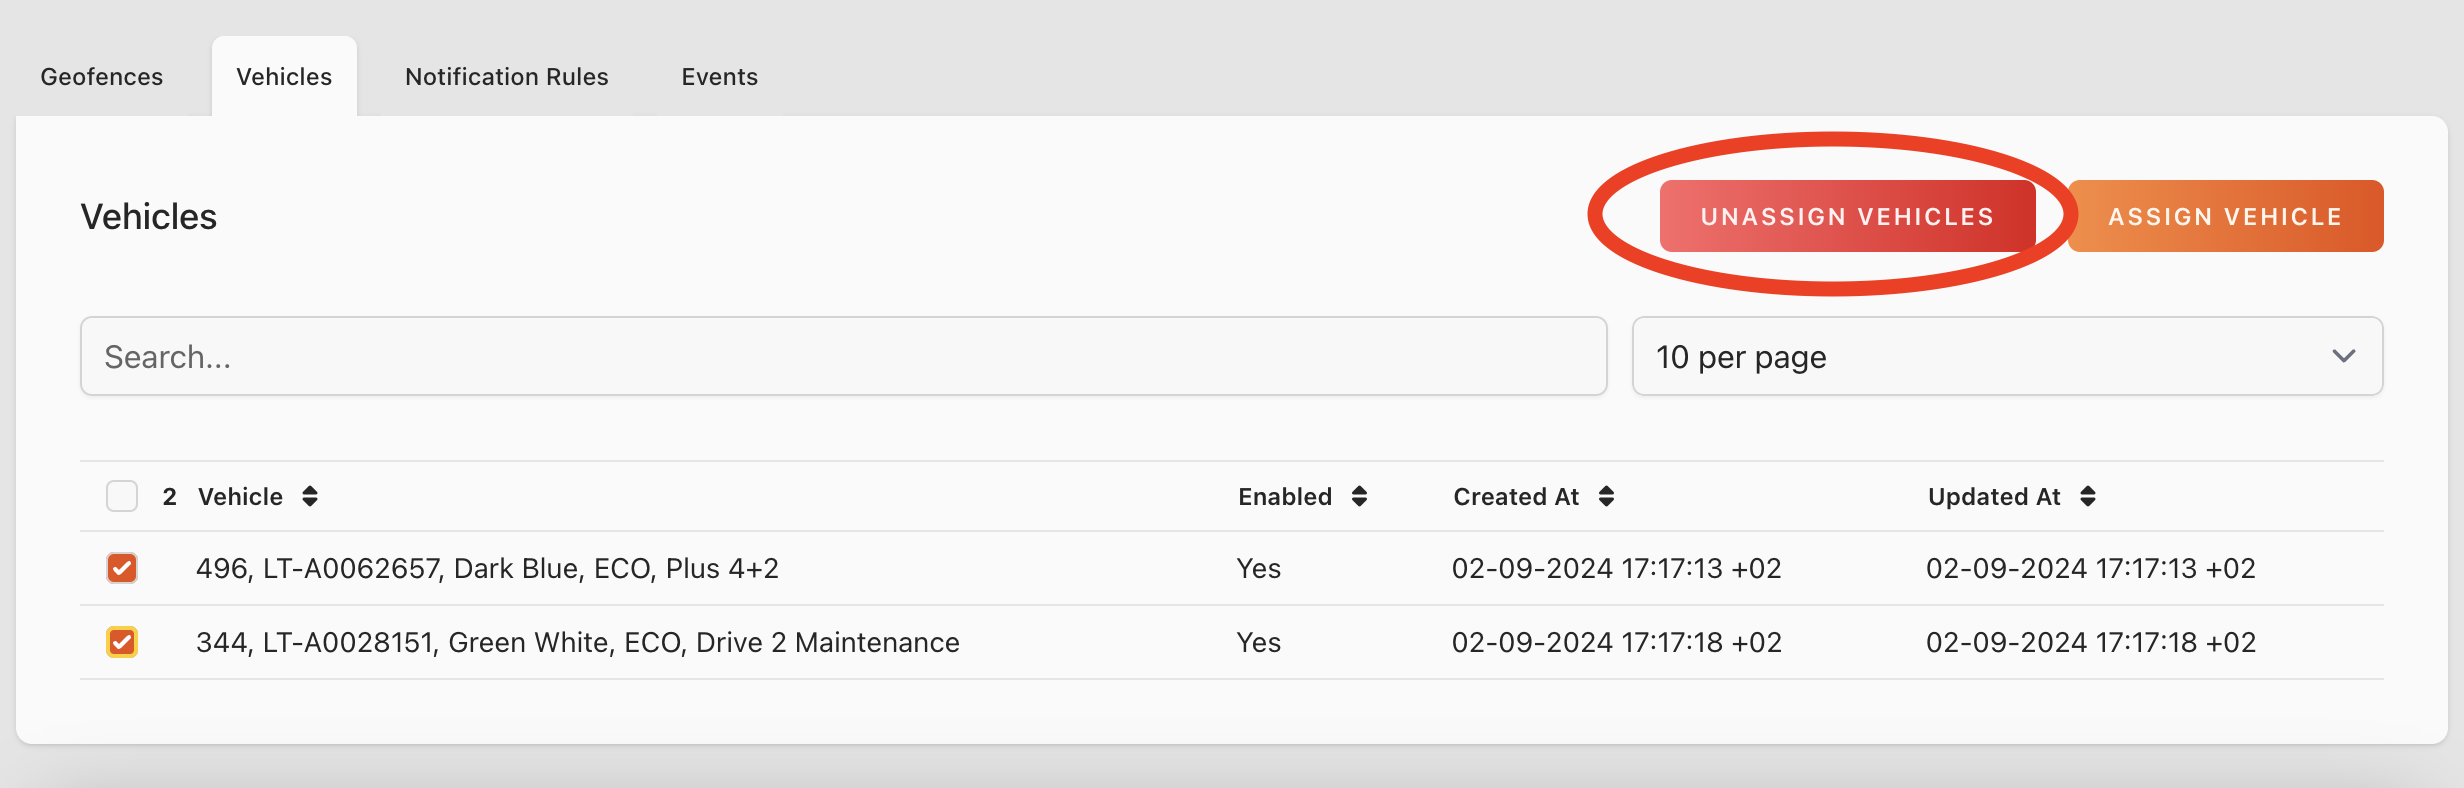
Select one or more vehicles and click to unassign vehicles.
Notification Rules
Geofence Group > Notification Rules
With notification rules you can configure how and when somebody is notified when a Geofence Event is created.
Create Notification Rules
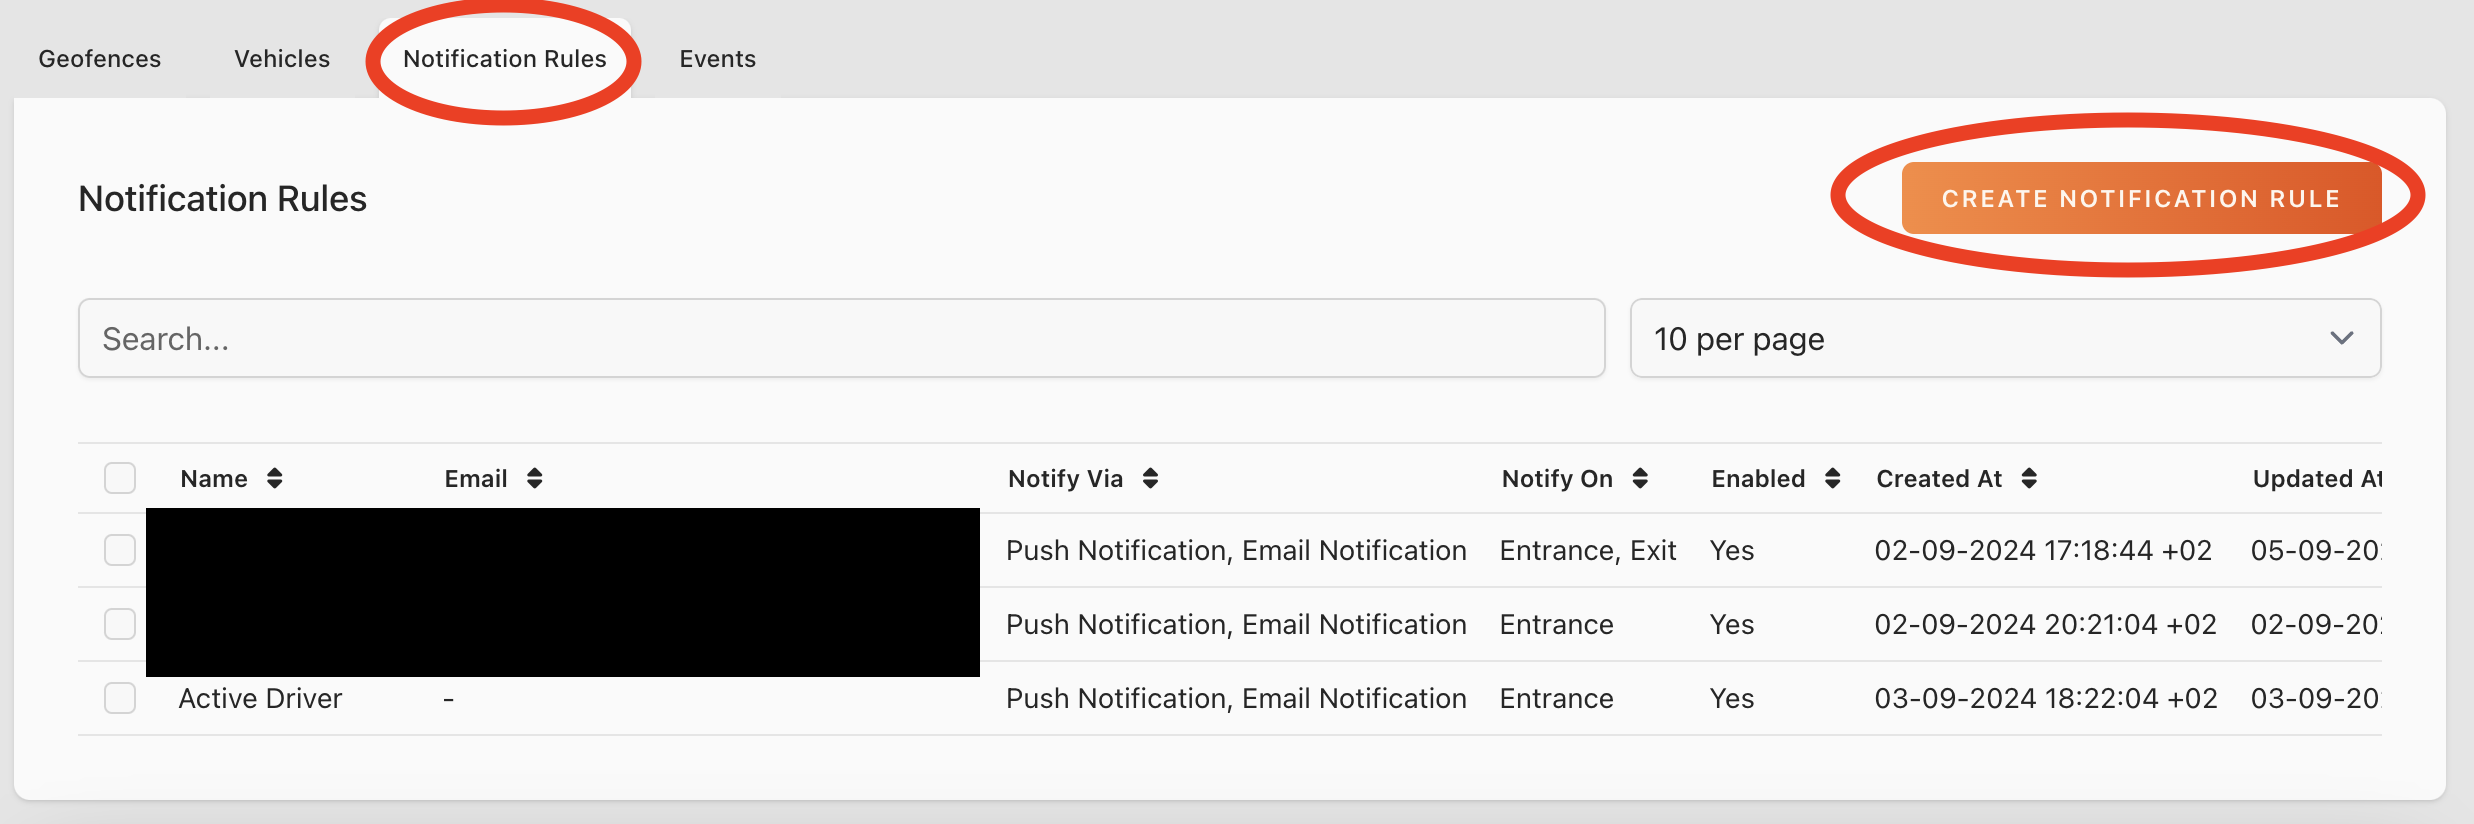
Click Create Notification Rule.

Notify
In the Notify Field you can select Active Driver or you can fill out the email of a specific user that will receive a notification when one of the Geofences in the Geofence Group is triggered. If you selected an Active Driver then the User that has unlocked the vehicle will receive the notification.
Please note you can only configure one user per notification rule. That means if you want to send notifications to one or more users, you need to create a new notification rule for each user.
Push and Email Notification
You can choose to use in-app push notifications or email notifications or you can enable both at the same time.
Please note that in-app push notifications only work if the user has the Eco Planeta IQ app installed, the user is logged in and has notifications enabled on his phone for this specific the app.
On Entrance
If you enter the Geofence the notification gets triggered.
On Dwelling
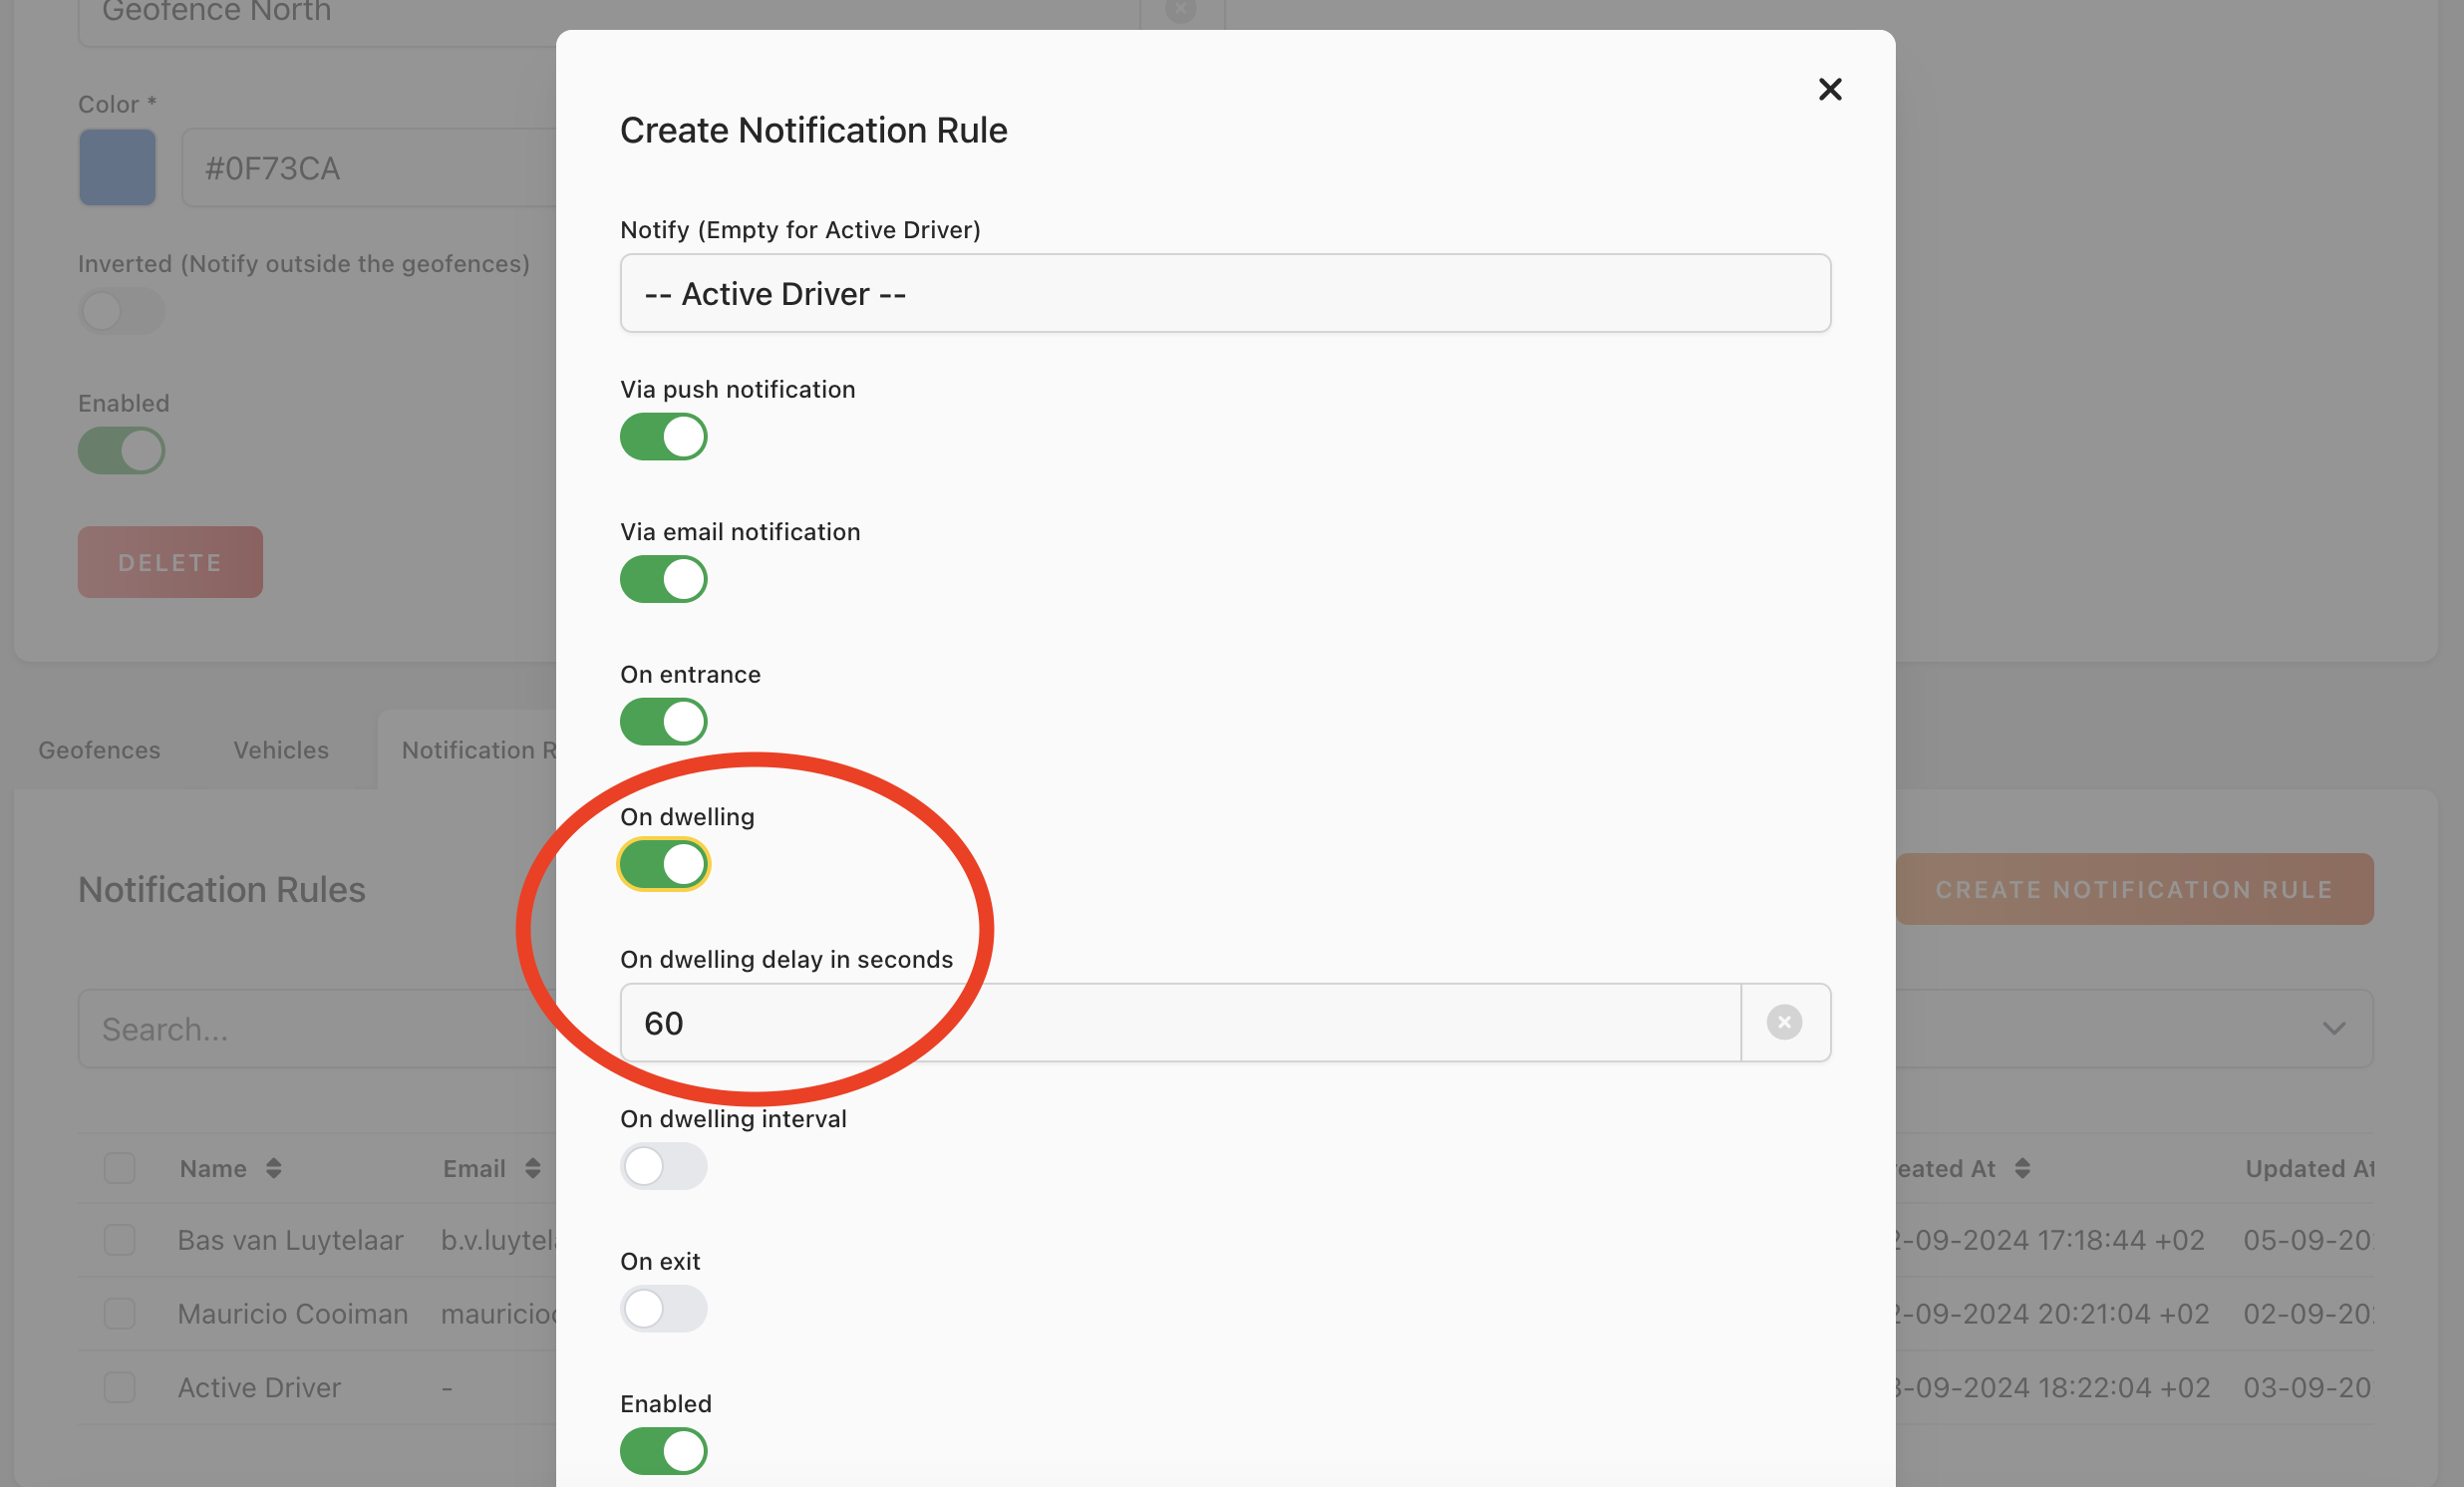
If you want to send a notification after a certain amount of dwell time in one of the Geofences in the Geofence Group, you have to enable On Dwelling and fill out after how many seconds you want to send the notification.
On Dwelling Interval
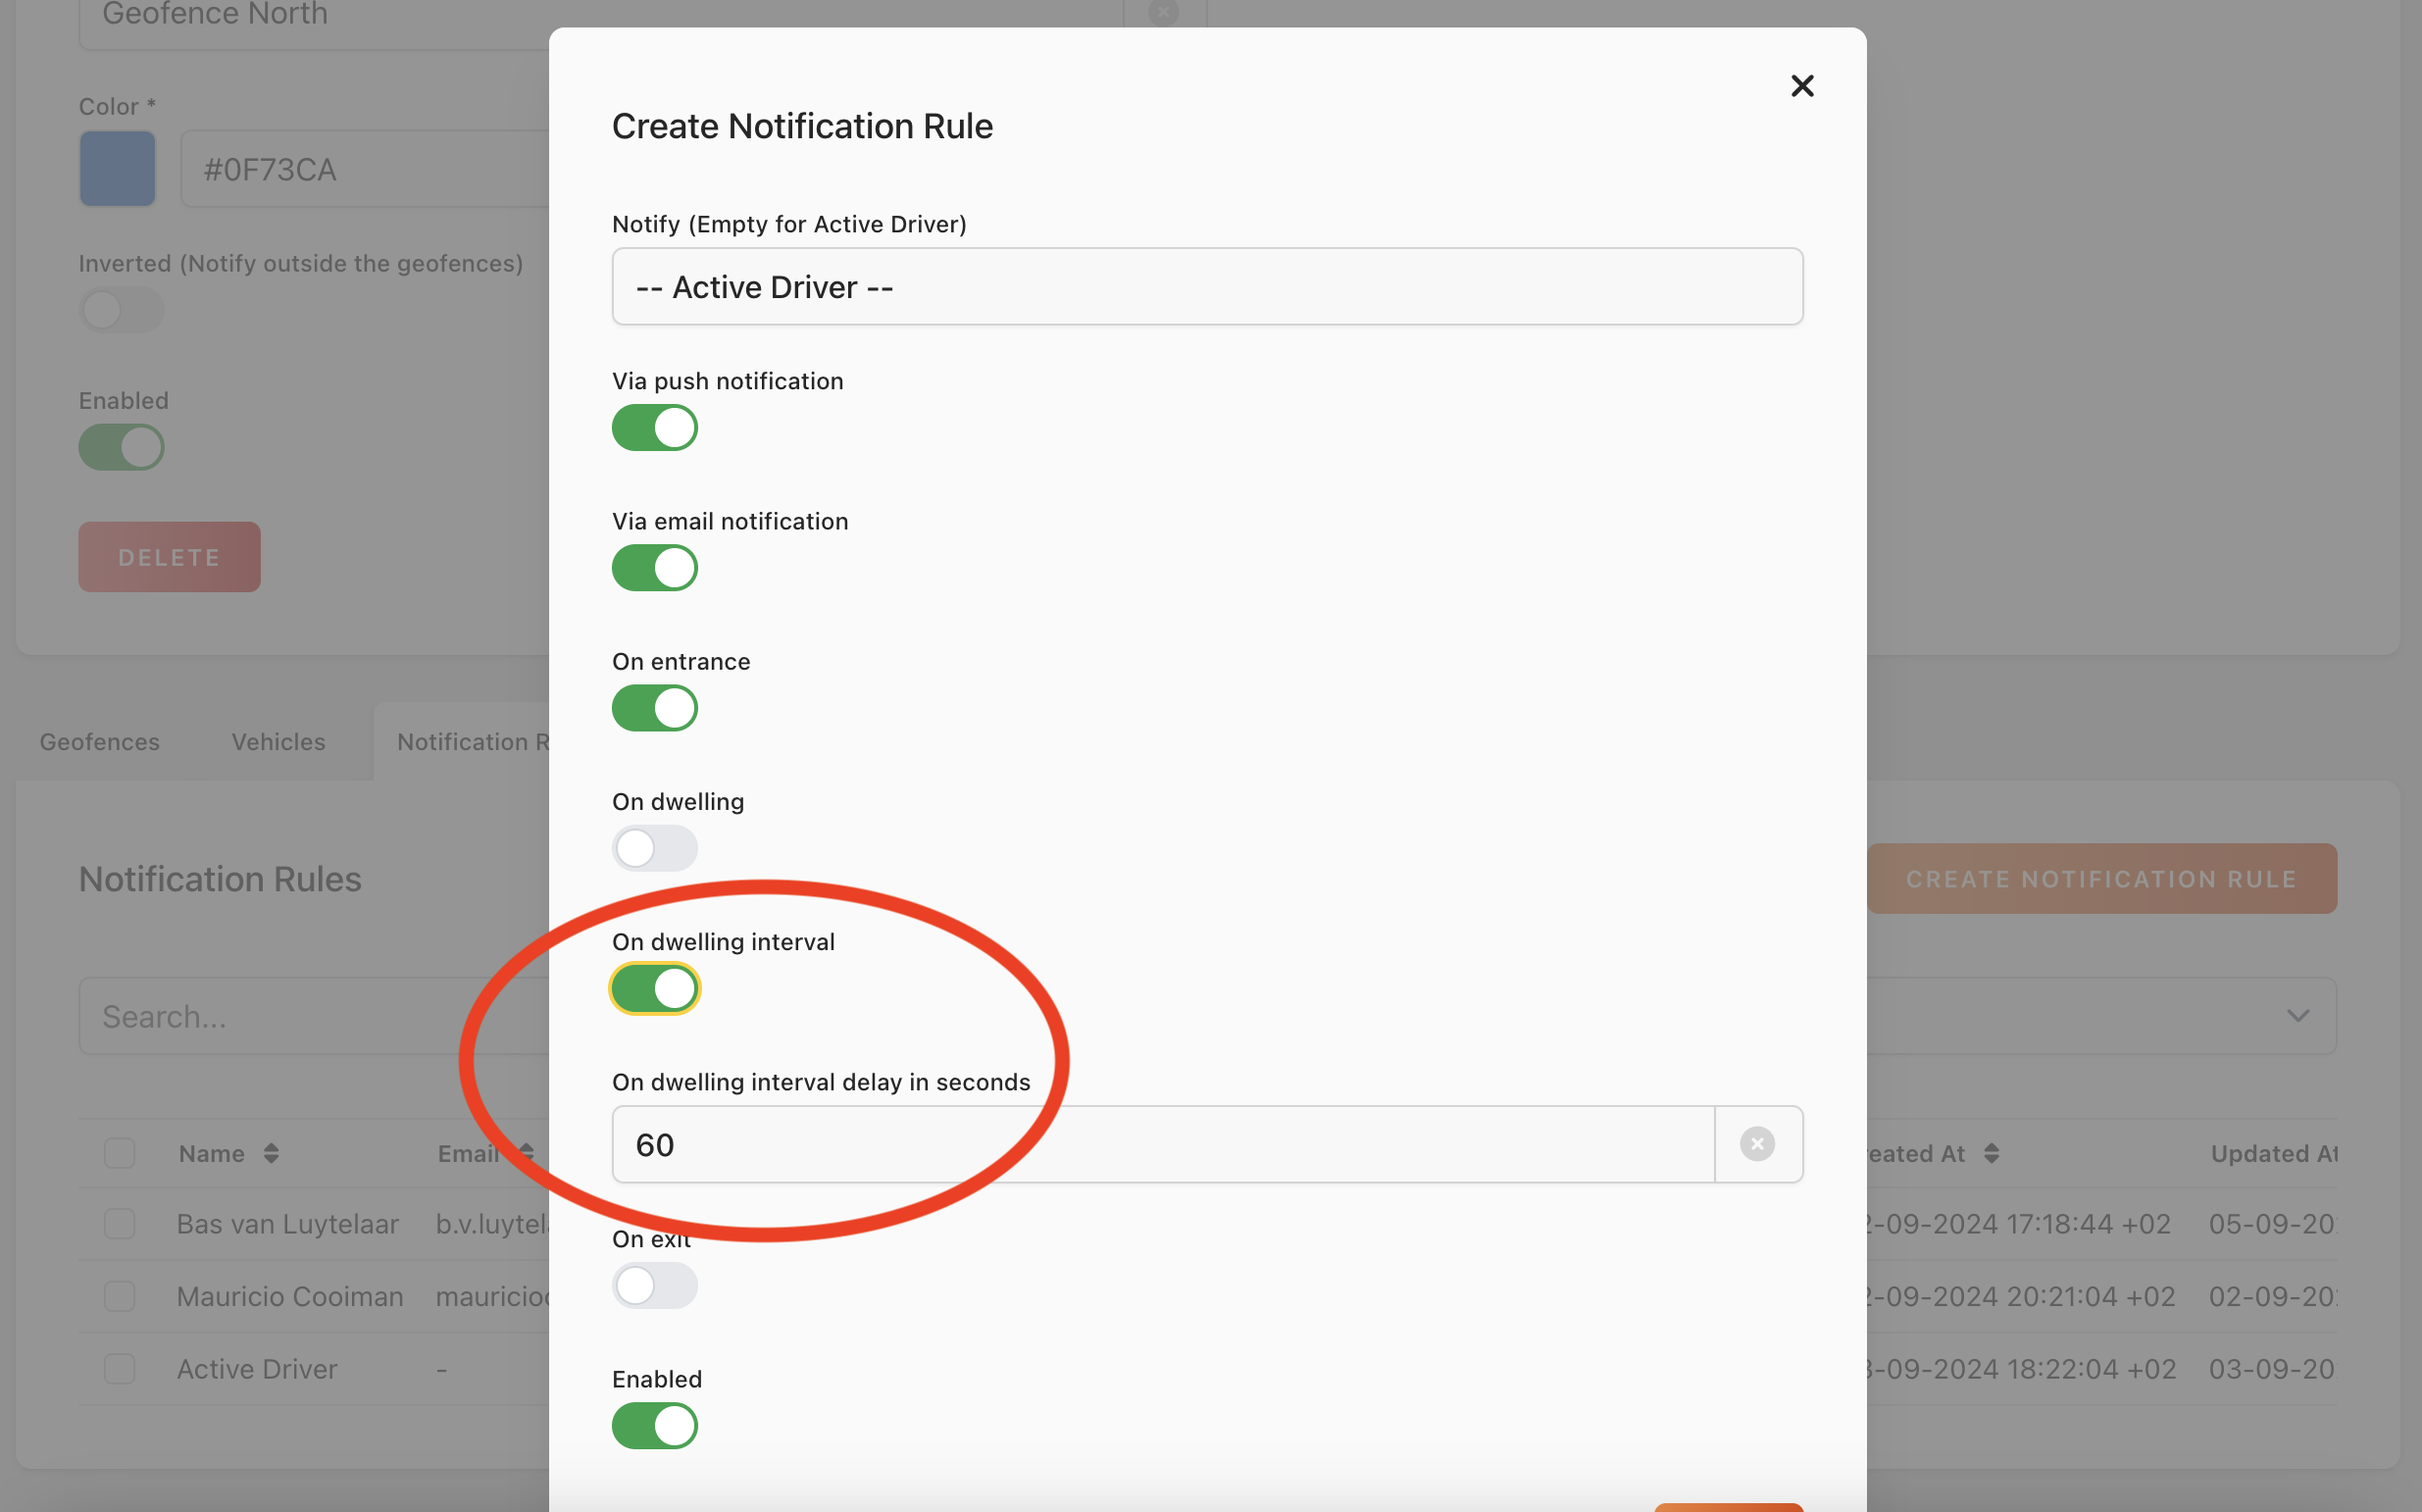
If you want to send notifications based on a interval you have to enable On Dwelling Interval. If you fill out for example 300 seconds, every 5 minutes a notification will be send if the vehicle is in one of the Geofences in the Geofence Group.
On Exit
If you enable this condition, a notification gets send if you exit one of the Geofences in the group.
Enabled
You can disable or enable each specific Geofence in your Geofence Group.
Geofence Events
Geofence Group > Geofence Events
Events
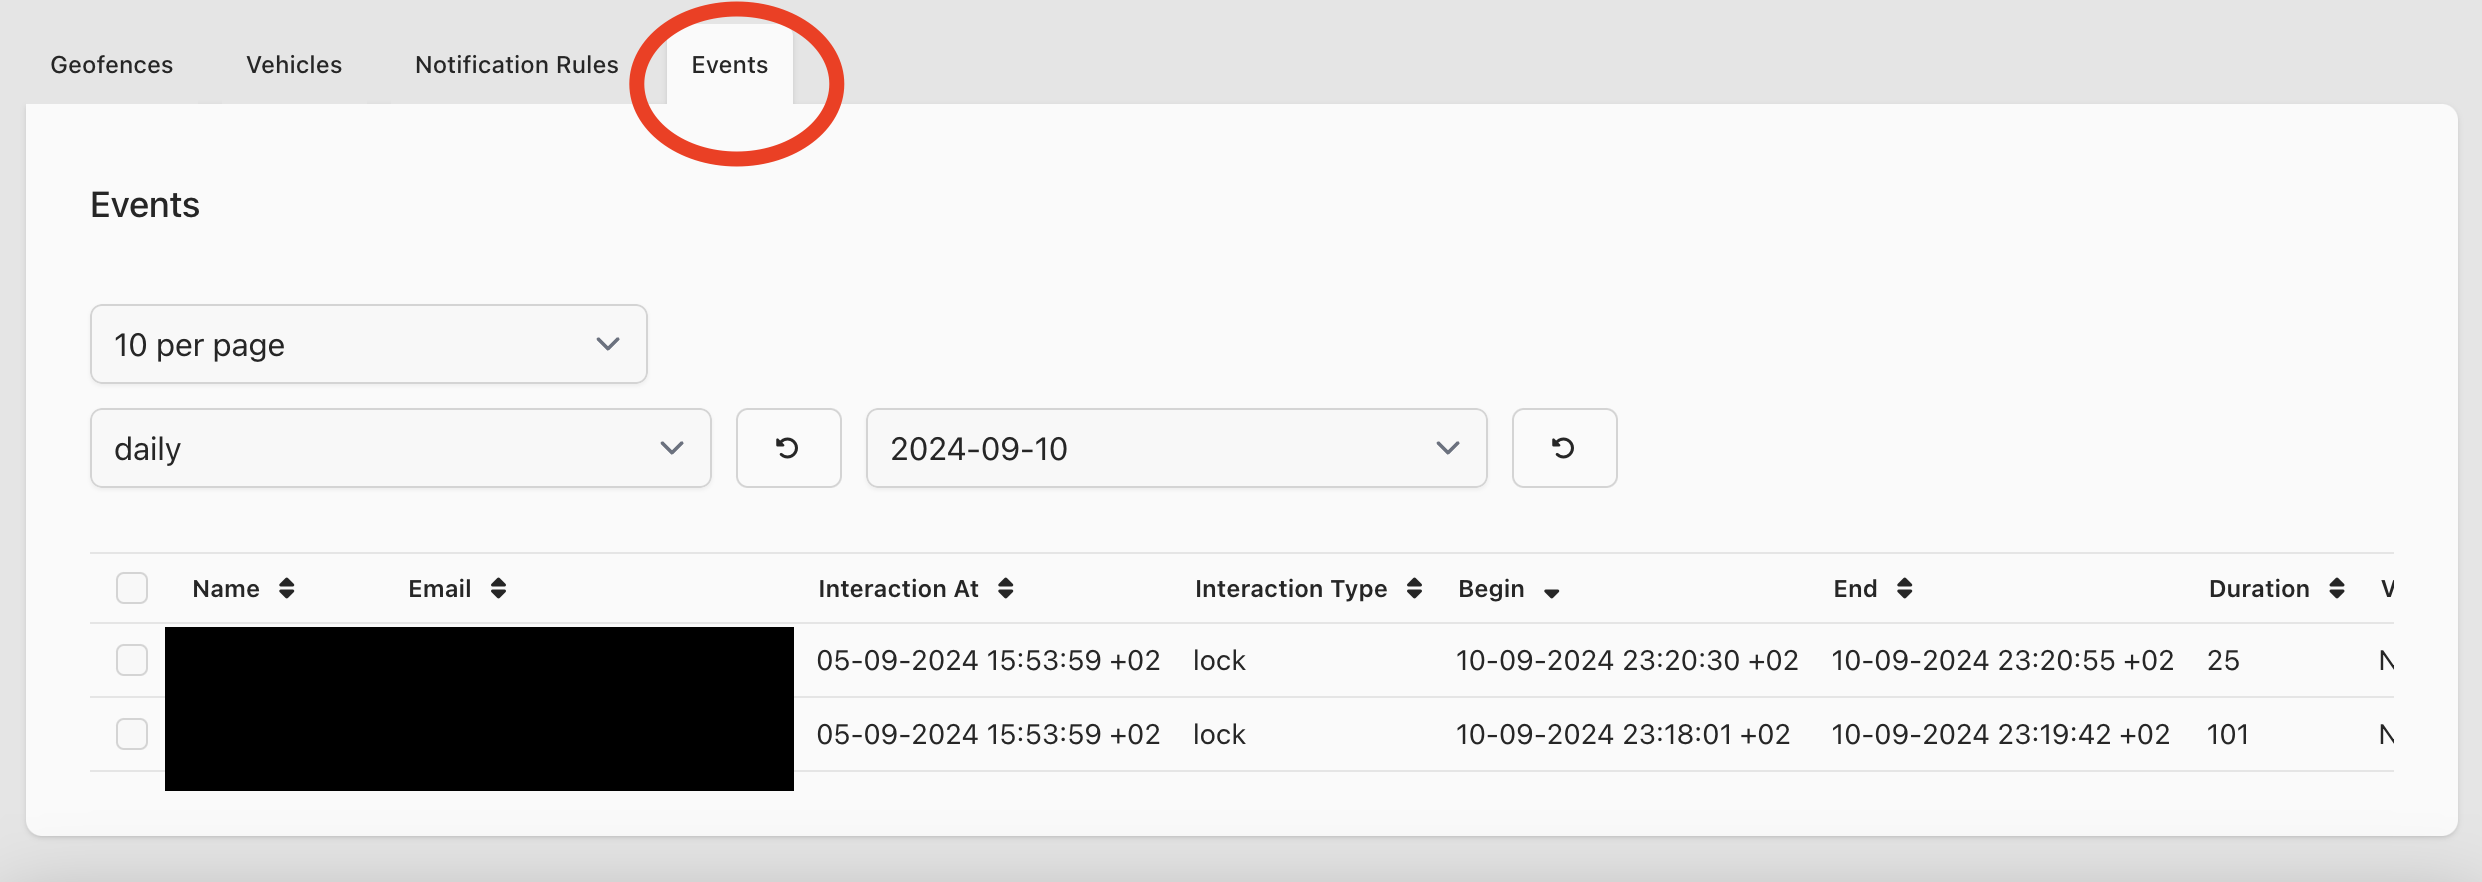
Every time a Geofence Event is triggered you will see a new event in the Geofence Events Table.
You will also see the last user that had interaction with the vehicle before the Geofence Event was generated. This way you will know who is using the vehicle when a certain Geofence was breached.
Please note that Geofence Events are triggered independent of configured notification rules.